


Add Categories To Your Rails 7 Applications!
Adding categories is something that I covered in the past, back in the Rails 5 days. Since then a lot has changed, but people still ask me to cover this topic in the updated framework. So today we’ll take a look at adding categories to a Rails 7 application.
Because this is a beginner tutorial, we’ll cover adding one category to each book. You can then list all the books under a certain category. A future tutorial will cover adding multiple categories to a single book. This will be useful for adding multiple genres, or allowing for a more easily searchable application.
The part that trips most people up, myself included, is probably the Rails form helpers. I’m not a huge fan of them personally, I’d rather just use HTML, but they’re a part of the framework. It essentially comes down to deciding whether you want to use the simple_form gem. If you do, then your select tag will be much easier. The downside is that it just adds more obscurity to what you’re doing. So instead, we’ll be using the basic form builder and a bit of high order function-ing.
YouTube Tutorial
Some people don’t like reading code. If that’s you, then check out the video version of this tutorial. It covers the same stuff, just in video form.
Timestamps
0:00 Generate Books and Categories
1:00 Add Categories to Your Model
1:30 Add Model Validations For Your Categories
3:44 Add Categories To Your Controller
4:06 Create A Select Dropdown For Your Categories
6:42 Seed Your Database With Default Categories
7:21 Sort Your Categories By Name
8:06 Showing What Each Category Has Under It
1 - Creating The Framework
The first step is to create the basic application. In this application there will be books and there will be categories, so we create both. Then we need to “Add” the categories to the books. You always add the foreign key to the thing that belongs to something else. In this case, a book belongs to a category. So we add categories to the books.
We then setup our routes and create a few basic categories inside of the seed file. If this is your first time using the seed file, think of it as the initial data that you want in your application. By creating it in here, you don’t need to manually create it in the Rails console. After you save the file, you can run the code by typing rails db:seed in your terminal. This should create the categories for you. You can verify this in your console.
Every code snippet contains highlighted lines so you know what needs to be added/run.
					# Create Your Categorizable Model
rails g scaffold book title body:text

# Create Your Categories
rails g scaffold category name

# Add Categories To Your Model (Replace book with your model name)
rails g migration AddCategoryToBook category:belongs_to

# Migrate Your Database
rails db:migrate
					Rails.application.routes.draw do
  # Create a root for your app if you don't already have one.
  root 'books#index'
  resources :categories
  resources :books
end
					# db/seeds.rb
Category.create(name: 'Fiction')
Category.create(name: 'Non-Fiction')
Category.create(name: 'Biography')
					# Seed your database
rails db:seed
2 - The Models
The changes to the model mostly focus around potential bugs you could run into. The last thing you want is to have someone create a book without a category. Best case scenario that would throw a database foreign key constraint, but you still wouldn’t receive validations in the form. The validations here allow us to have form validations, while acting as a first defense for the database validations.
The second piece of the models focuses on the one-to-many relationship. In database design, one-to-many means that one thing, a category, has many of another thing, books. So in this case we’re giving each category many books.
					# app/models/category.rb

class Category < ApplicationRecord
  validates :name, presence: true, uniqueness: true
  has_many :books
end
					# app/models/book.rb

class Book < ApplicationRecord
  validates :category_id, presence: true
  belongs_to :category
end
3 - The Controllers
The controller is fairly straight forward. We want to set the @categories variable for all of our actions inside the books controller. This will be used for displaying categories, as well as selecting them in the dropdown. We can call a set categories function by declaring a before_action on line 5.
We then want to allow-list the category_id parameter inside of the book_params method on line 70. Finally, we order all of the categories. You can see on line 74 that this is done by the category name, though it could be any field you’ve added to the categories.
					# app/controllers/books_controller.rb

class BooksController < ApplicationController
  before_action :set_book, only: %i[show edit update destroy]
  before_action :set_categories

  # GET /books or /books.json
  def index
    @books = Book.all
  end

  # GET /books/1 or /books/1.json
  def show; end

  # GET /books/new
  def new
    @book = Book.new
  end

  # GET /books/1/edit
  def edit; end

  # POST /books or /books.json
  def create
    @book = Book.new(book_params)

    respond_to do |format|
      if @book.save
        format.html { redirect_to book_url(@book), notice: 'Book was successfully created.' }
        format.json { render :show, status: :created, location: @book }
      else
        format.html { render :new, status: :unprocessable_entity }
        format.json { render json: @book.errors, status: :unprocessable_entity }
      end
    end
  end

  # PATCH/PUT /books/1 or /books/1.json
  def update
    respond_to do |format|
      if @book.update(book_params)
        format.html { redirect_to book_url(@book), notice: 'Book was successfully updated.' }
        format.json { render :show, status: :ok, location: @book }
      else
        format.html { render :edit, status: :unprocessable_entity }
        format.json { render json: @book.errors, status: :unprocessable_entity }
      end
    end
  end

  # DELETE /books/1 or /books/1.json
  def destroy
    @book.destroy

    respond_to do |format|
      format.html { redirect_to books_url, notice: 'Book was successfully destroyed.' }
      format.json { head :no_content }
    end
  end

  private

  # Use callbacks to share common setup or constraints between actions.
  def set_book
    @book = Book.find(params[:id])
  end

  # Only allow a list of trusted parameters through.
  def book_params
    params.require(:book).permit(:title, :body, :category_id)
  end

  def set_categories
    @categories = Category.all.order(:name)
  end
end
4 - The Views
For the views, the first step is the form. The select tag added on line 24 is where the magic happens. The options_for_select tag takes a few arguments, such as the collection. In this case, we call the “collect” method on the @categories variable. This is a method provided by Ruby, which you can read about here.
In essence, we iterate through each item, and return an array containing [item.name, item.id]. The options for select then converts those into the name you display, and the ID that name sends to the controller. That ID is then stored in the book’s belong_to foreign key, which allows it to figure out what category it belongs to.
The book partial then shows how to link to a book’s specific category and access its name. This is useful for linking from a child to its parent page show page, which the scaffolds give us. Because the categories were made with a scaffold, we have access to all the usual CRUD actions for categories.
					<!-- app/views/_form.html.erb -->

<%= form_with(model: book) do |form| %>
  <% if book.errors.any? %>
    <div style="color: red">
      <h2><%= pluralize(book.errors.count, "error") %> prohibited this book from being saved:</h2>
      <ul>
        <% book.errors.each do |error| %>
          <li><%= error.full_message %></li>
        <% end %>
      </ul>
    </div>
  <% end %>
  <div>
    <%= form.label :title, style: "display: block" %>
    <%= form.text_field :title %>
  </div>
  <div>
    <%= form.label :body, style: "display: block" %>
    <%= form.text_area :body %>
  </div>
  <div>
    <%= form.label :category, style: "display: block" %>
    <%= form.select :category_id, options_for_select(@categories.collect { |cat| [cat.name, cat.id]})%>
  </div>
  <div>
    <%= form.submit %>
  </div>
<% end %>
					<!-- app/views/_book.html.erb -->

<div id="<%= dom_id book %>">
  <p>
    <strong>Title:</strong>
    <%= book.title %>
  </p>
  <p>
    <strong>Category:</strong>
    <%= link_to book.category.name, book.category %>
  </p>
  <p>
    <strong>Body:</strong>
    <%= book.body %>
  </p>
</div>
Displaying Each Category's Books
This small snippet is useful if you’d like to show each category’s books. This is great if you want to have a category’s show page list all of the books or articles under that category. And because it’s in the partial, this will also work on the categories index page. The index page them becomes a master catalogue of sorted books for you to browse!
					<!-- app/views/categories/_category.html.erb -->

<div id="<%= dom_id category %>">
  <h2>
    <strong>Category:</strong>
    <%= category.name %>
  </h2>
  <% category.books.each do |book| %>
    <p>
      <%= book.title %> | <%= link_to "View Book", book %>
    </p>
  <% end %>
</div>
Conclusion
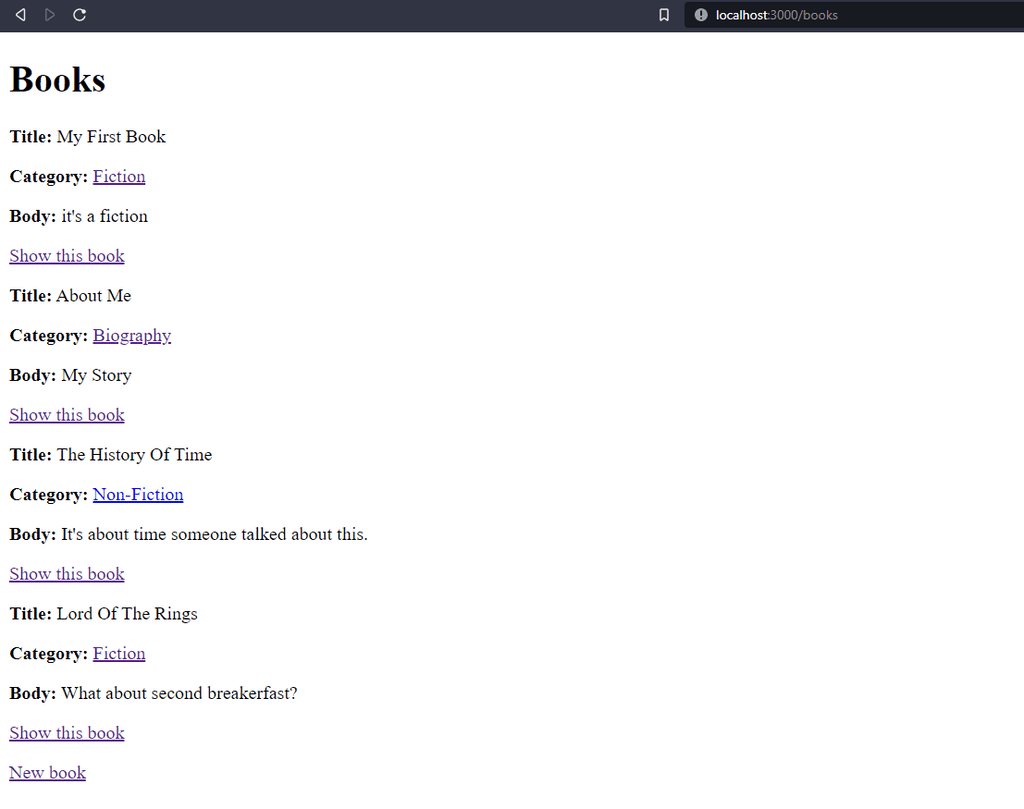
As you can see below, this basic category system can be very powerful. It’s also really easy to apply to other types of problems. The words might not be “books” and “categories” but the solution might look similar for you. Maybe you have movies and genres, articles and journals, or games and ratings. All of these would follow the same structure.
It’s been a while since I’ve posted one of these blog posts. Hopefully you’ve found it helpful. I usually find writing these much more helpful than doing the video tutorial, because it forces me to actively articulate the steps. The videos are mostly my brain just on autopilot haha. See you in the next one!
3 replies on “Add Categories To Your Ruby on Rails 7 Application!”
Great walk through. Much appreciated sir.
Thank you
I’m looking for a combobox type select, so if you want a new category… just enter it and it will be added to the categories.