


What is Git & Why Install Git On Windows 11?
Throughout your career as a software developer, there will be a myriad of essential tools that fall outside of the scope of learning programming languages. Some of these tools will allow your business to operate more efficiently, such as Jira. Other tools, such as Git, will greatly increase collaboration and quality of life for software developers. This tutorial will help you get started with Windows 11 Git.
Unfortunately, a lot of universities fall short while teaching Git. Anecdotally speaking, as a software product lead, every junior developer I trained required the Git fundamentals taught to them. This blog post should hopefully cover some of those fundamentals post-installation. So if you feel like you might have some Git learning in you, this post should help!
We will start by installing Git on Windows 11. Afterward, we will step through using some beginner commands to create and use a repository. We will also explain what a Git repository is. Finally, we will cover how to reset to the last commit if something went wrong!
Git was one area where I saw a lot of challenges for junior developers during my time in the industry. I was fortunate to learn Git during my Undergraduate degree, but I could tell that I was in the minority there. After my time as a Software Product Lead where I mentored a good number of junior developers, I decided to address the problem myself. I’m creating a complete Git Developer Essentials course available here (Soon). The syllabus and a few lessons are viewable for free, and you can use code GIT11Off to get 11% off, get it? 🙂
Video Version of Tutorial
Video Timestamps
0:00 How To Install Git On Windows 10 and Windows 11
1:54 Making A GitHub Repository
3:00 Initializing A Git Repository
3:42 Using The Git Add . Command
3:47 Using The Git Status Command
3:58 Adding A Git Global Username
4:09 Adding A Git Global Email
4:36 Using The Git Commit Command
4:46 Setting The Git Main Branch
4:54 Adding The Git Remote Origin
5:13 Using The Git Push Command
6:00 Changing A Remote Git Repository With A Pull Request
7:45 How To Pull Remote Changes From A Git Repository
7:58 Using The Git Reset Command
8:18 Outro and Video Summary
1 - Installing Windows 11 Git
We’ll start off by downloading and installing Git. On Linux, this is usually as simple as running a command, which lets you use git commands from your terminal. On Windows, you need to download a specific package and install it. This package will come with Git Bash, a Unix-style client. You don’t need to use this.
After adding Git to your Windows path, all commands should work in newly opened PowerShell and Command Prompt windows. If your command doesn’t work post-installation, try closing your command terminal and reopening it.
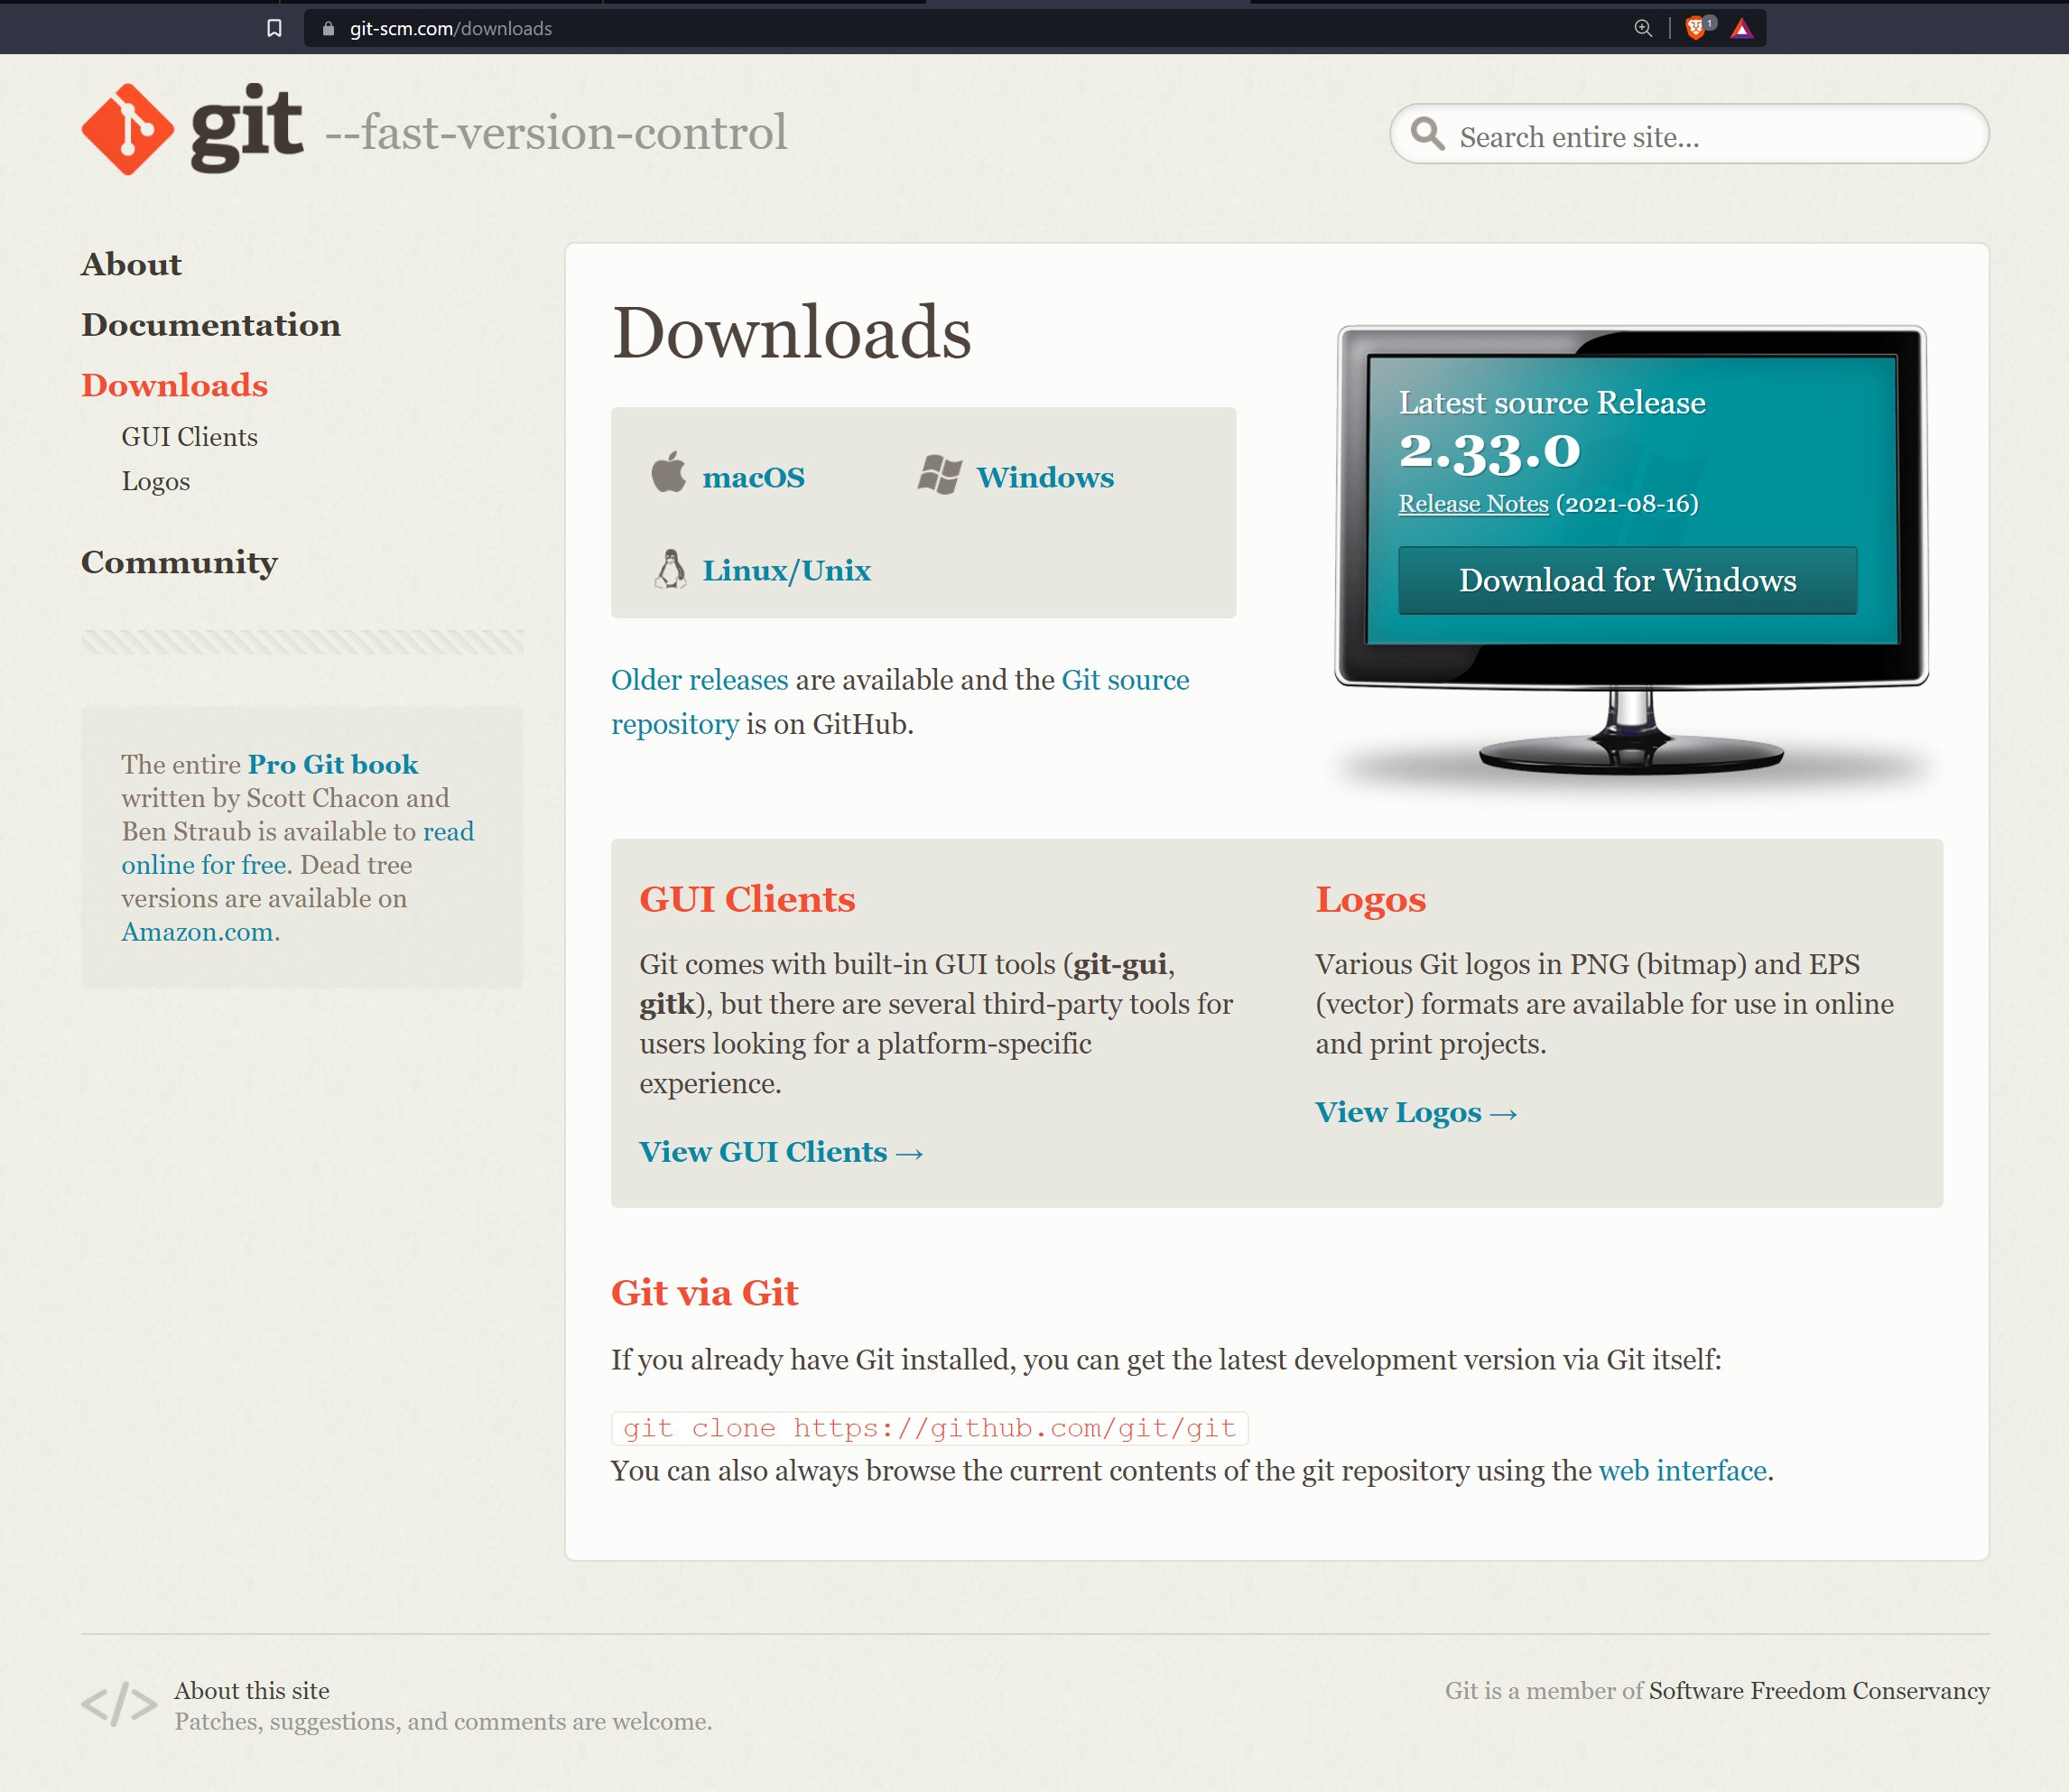
Anyways, let’s navigate over to git-scm.com and download the latest version of the Windows Git Client.
Windows 11 Git Installer Notes
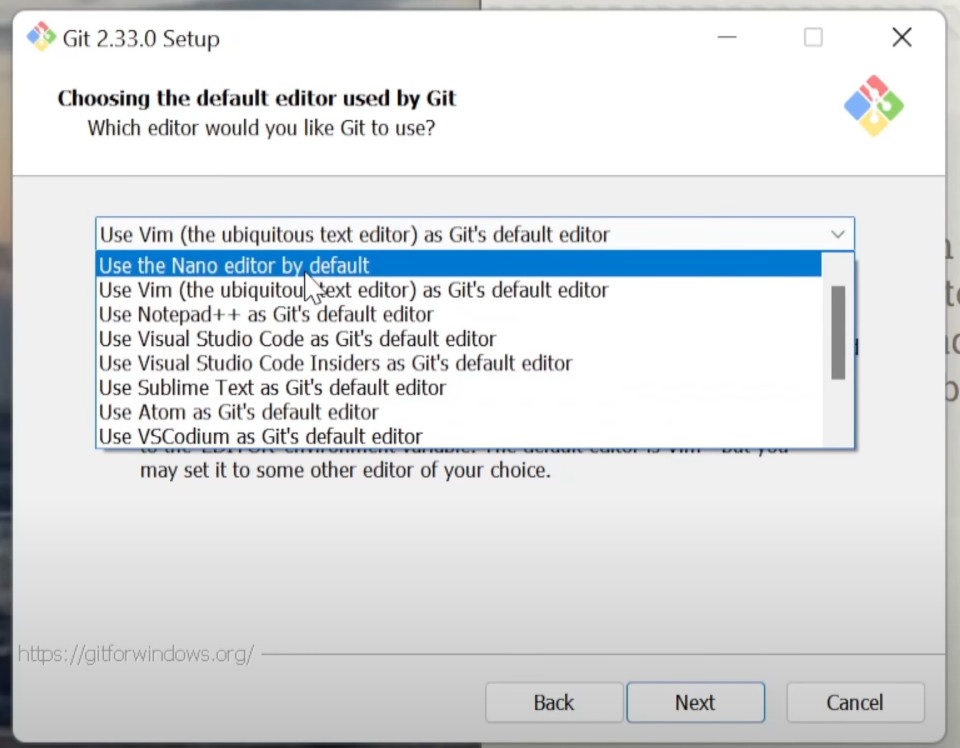
Following the download, just run the installer and click through the default settings. There are a few points of interest that you might want to pay attention to. The first is that you can change the default Git editor from Vim to something else, like Nano (Pictured below) or Visual Studio Code.
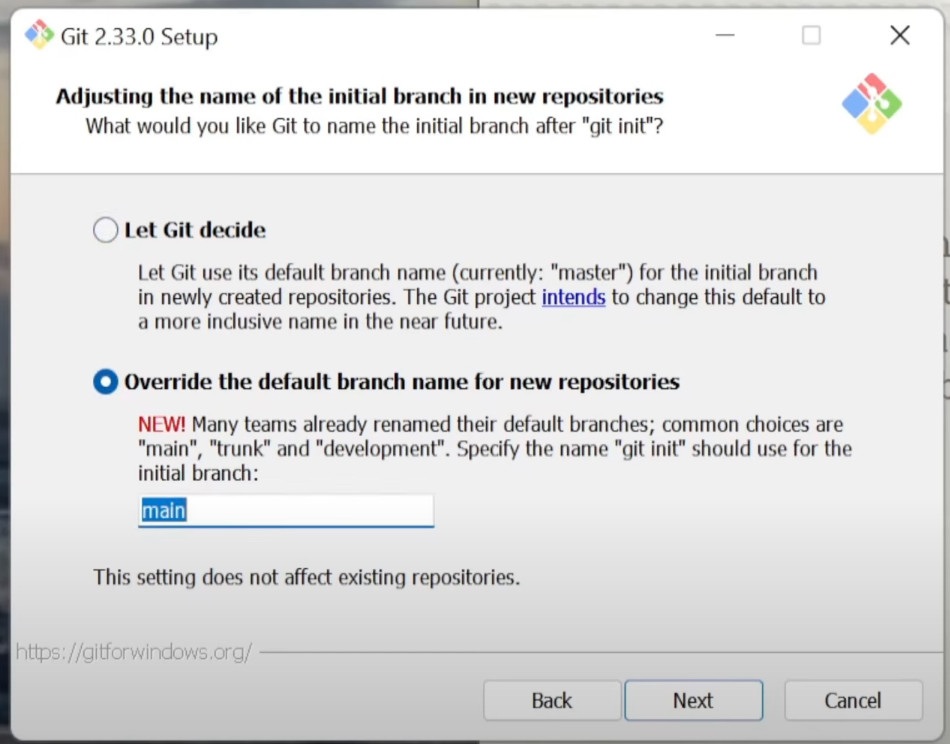
The second is that by default, as of 2.33.0, Git still defaults to master as the main branch. A lot of the industry is moving away from the master terminology and instead choosing to name their main branch main. So I’d recommend clicking override unless your version has it as the default already. Set your default main branch to main.
After clicking next enough times and eventually clicking finish, you should have Git installed. The tutorial isn’t over yet, though, as we’ll be moving onto how you can actually use Git!
2 - Create A Remote Git Repository
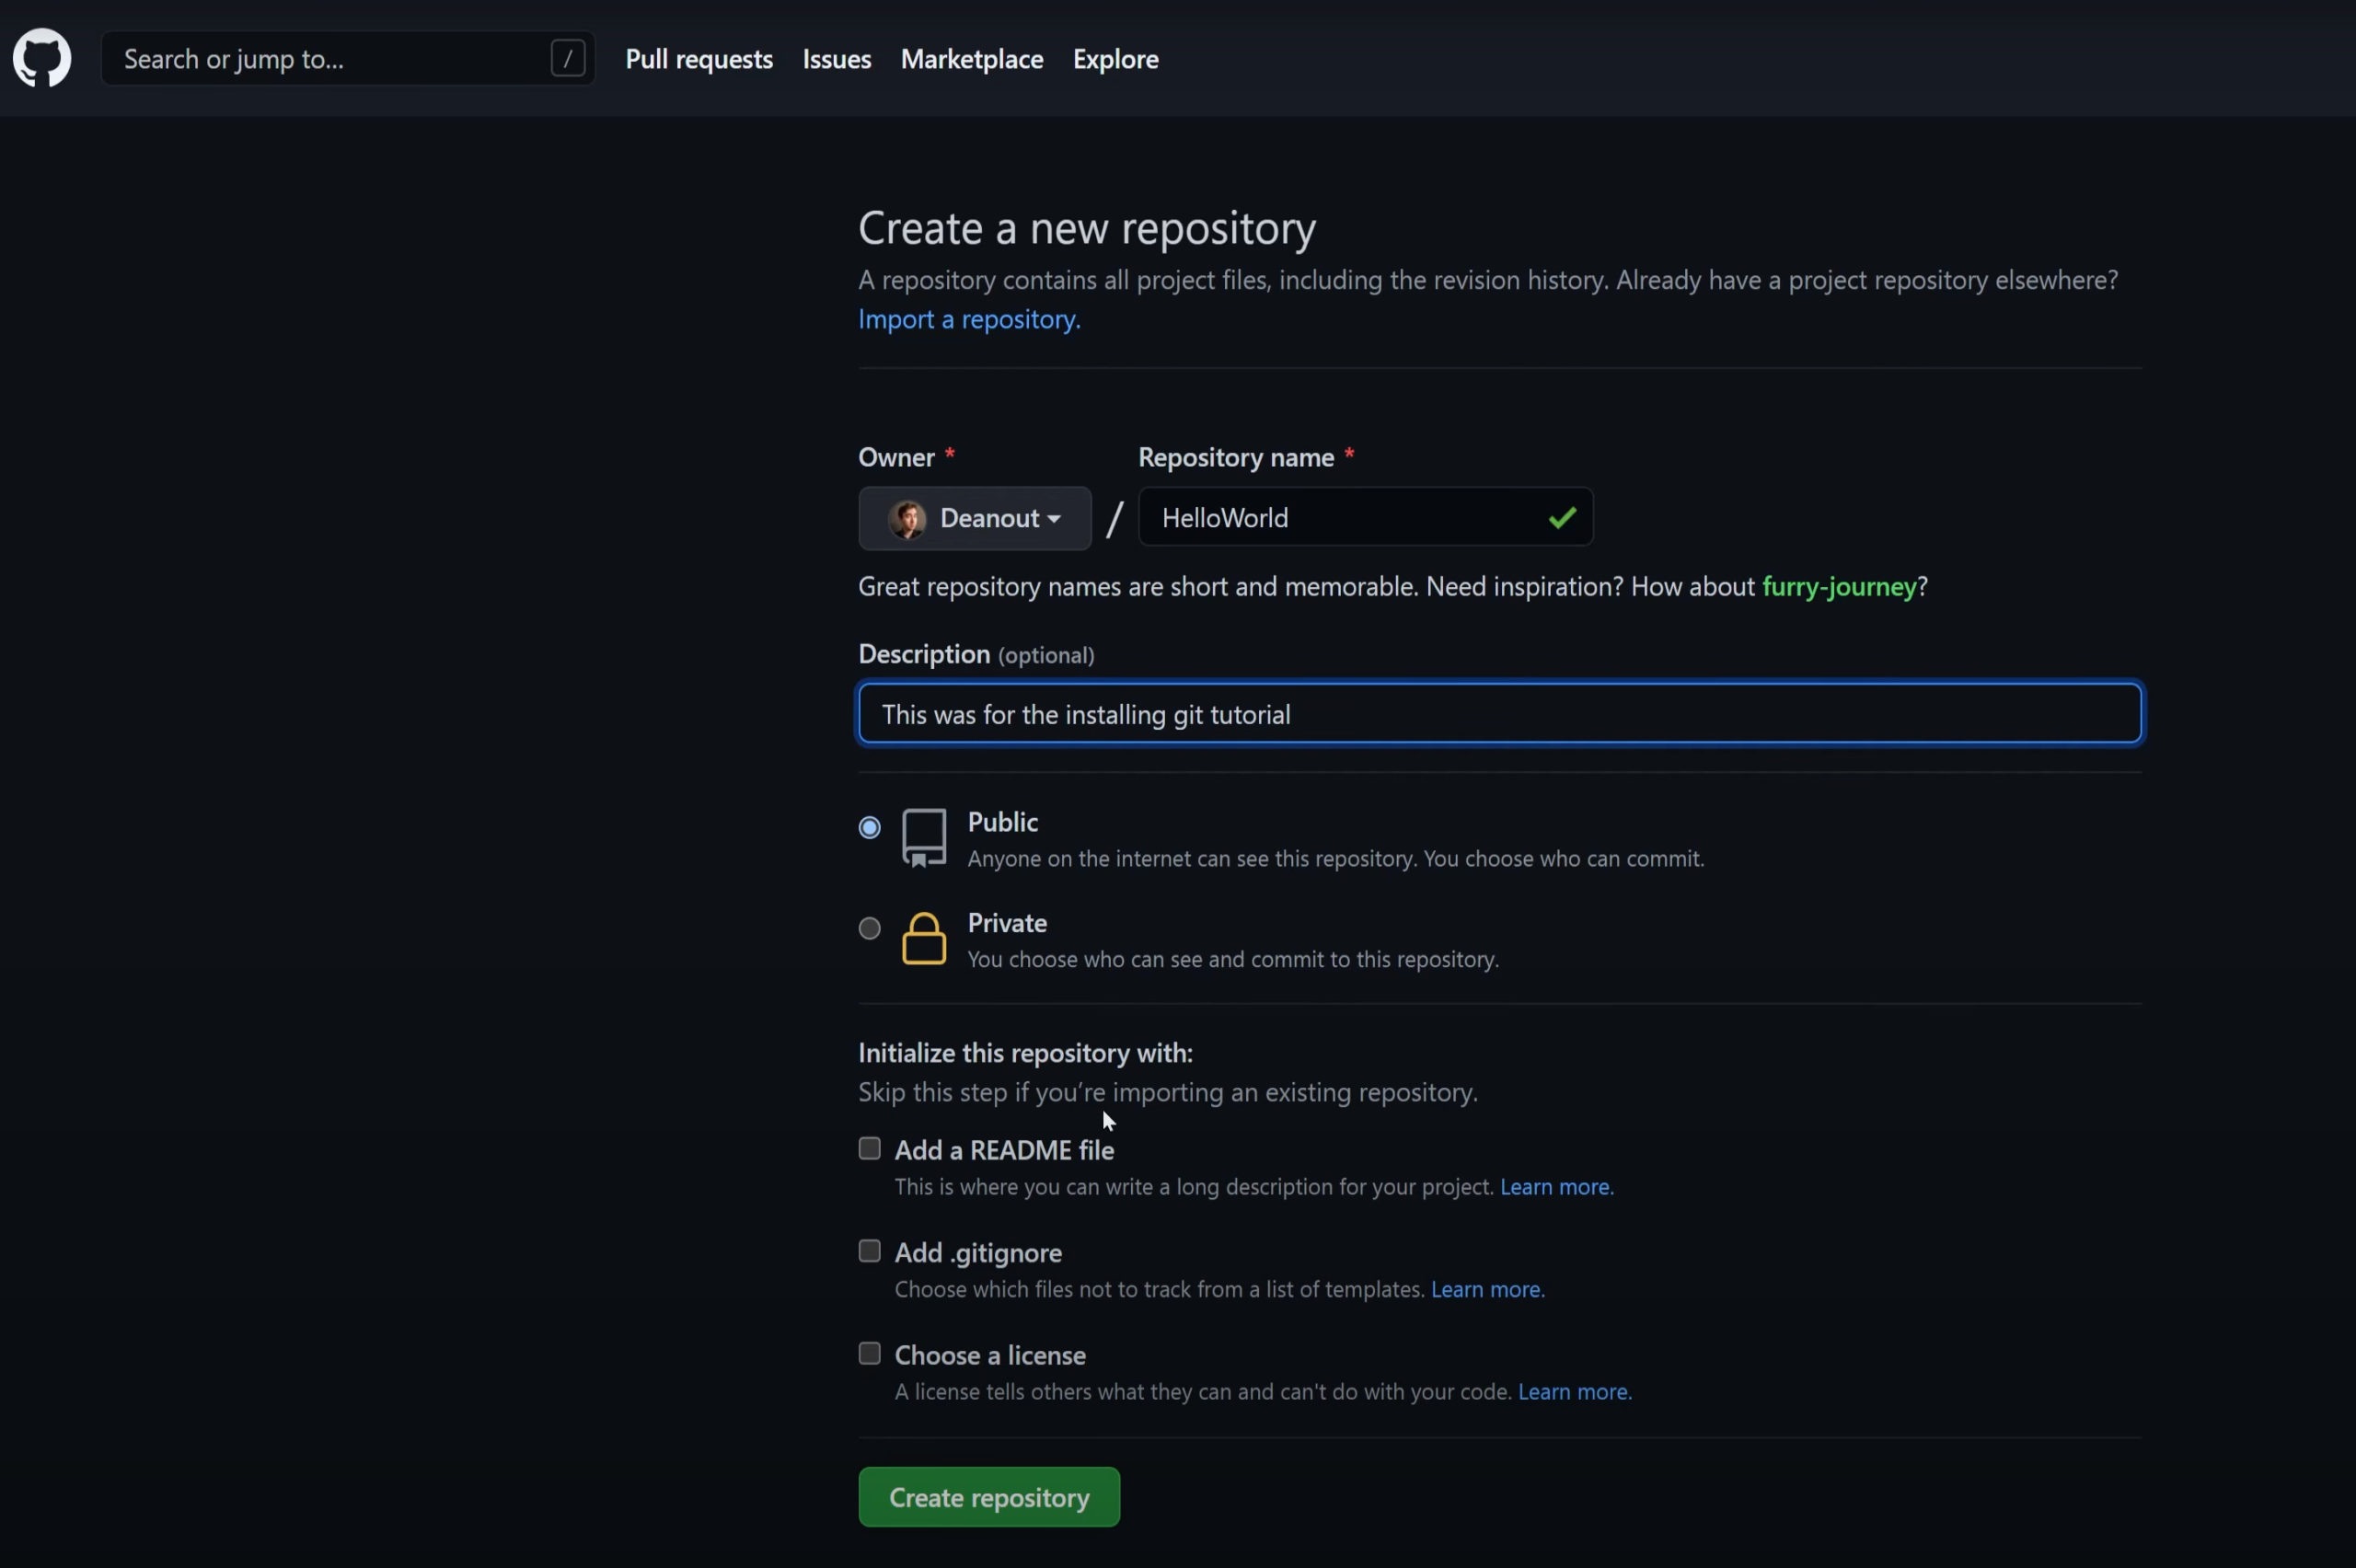
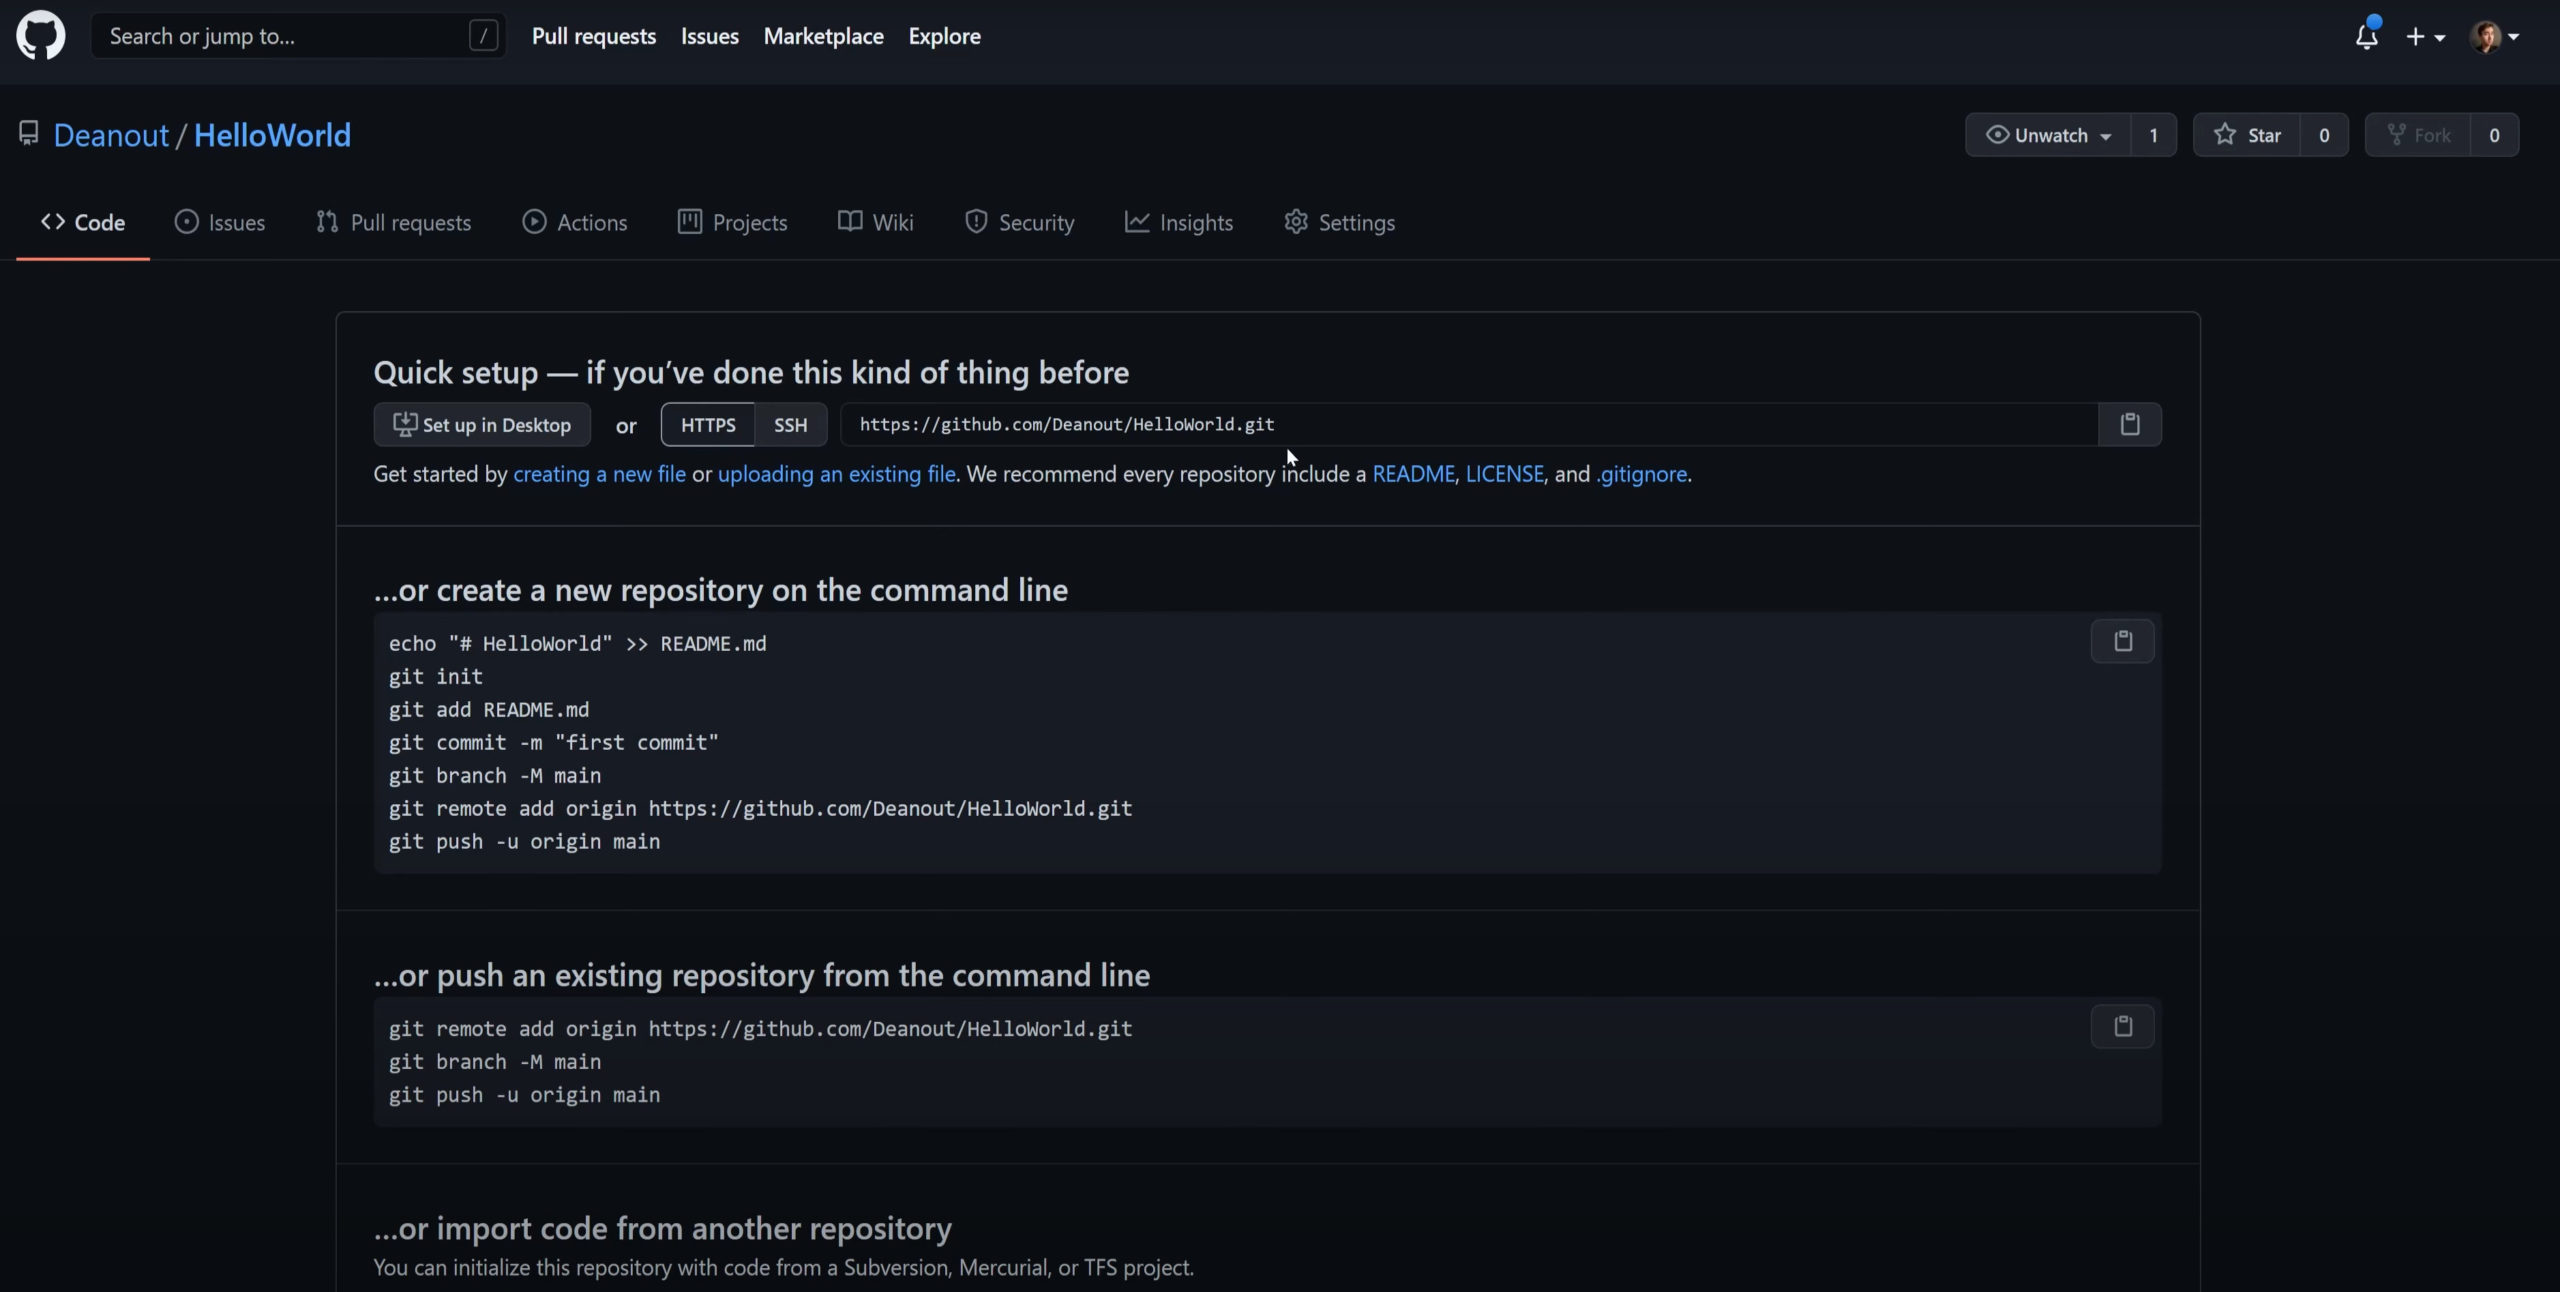
Let’s start our Git journey by creating a repository on GitHub. This is one of the best-known remote repository hosting services, and in 2018 was acquired by Microsoft. After creating an account or logging in, click on the + in the top right and select “New Repository,” shown below.
Next, name your repository and give it a description. Optionally you may select to add a ReadMe or a License, though for the purposes of this tutorial we’ll skip those steps and instead manually create our entire repository. Finally, you should have something that looks like photo #3 below. We should now be ready to create our local repository for our code.

3 - Initializing A Git Repository
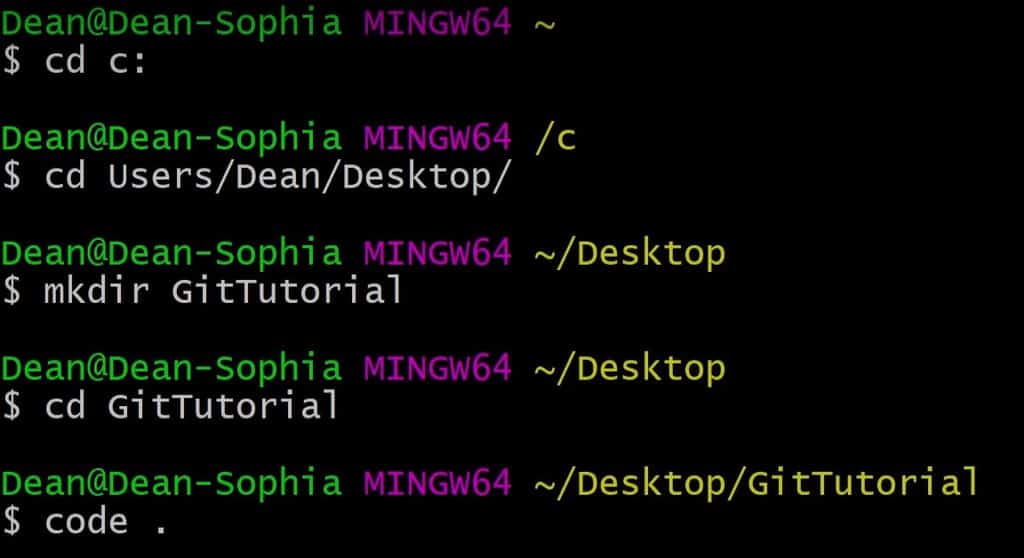
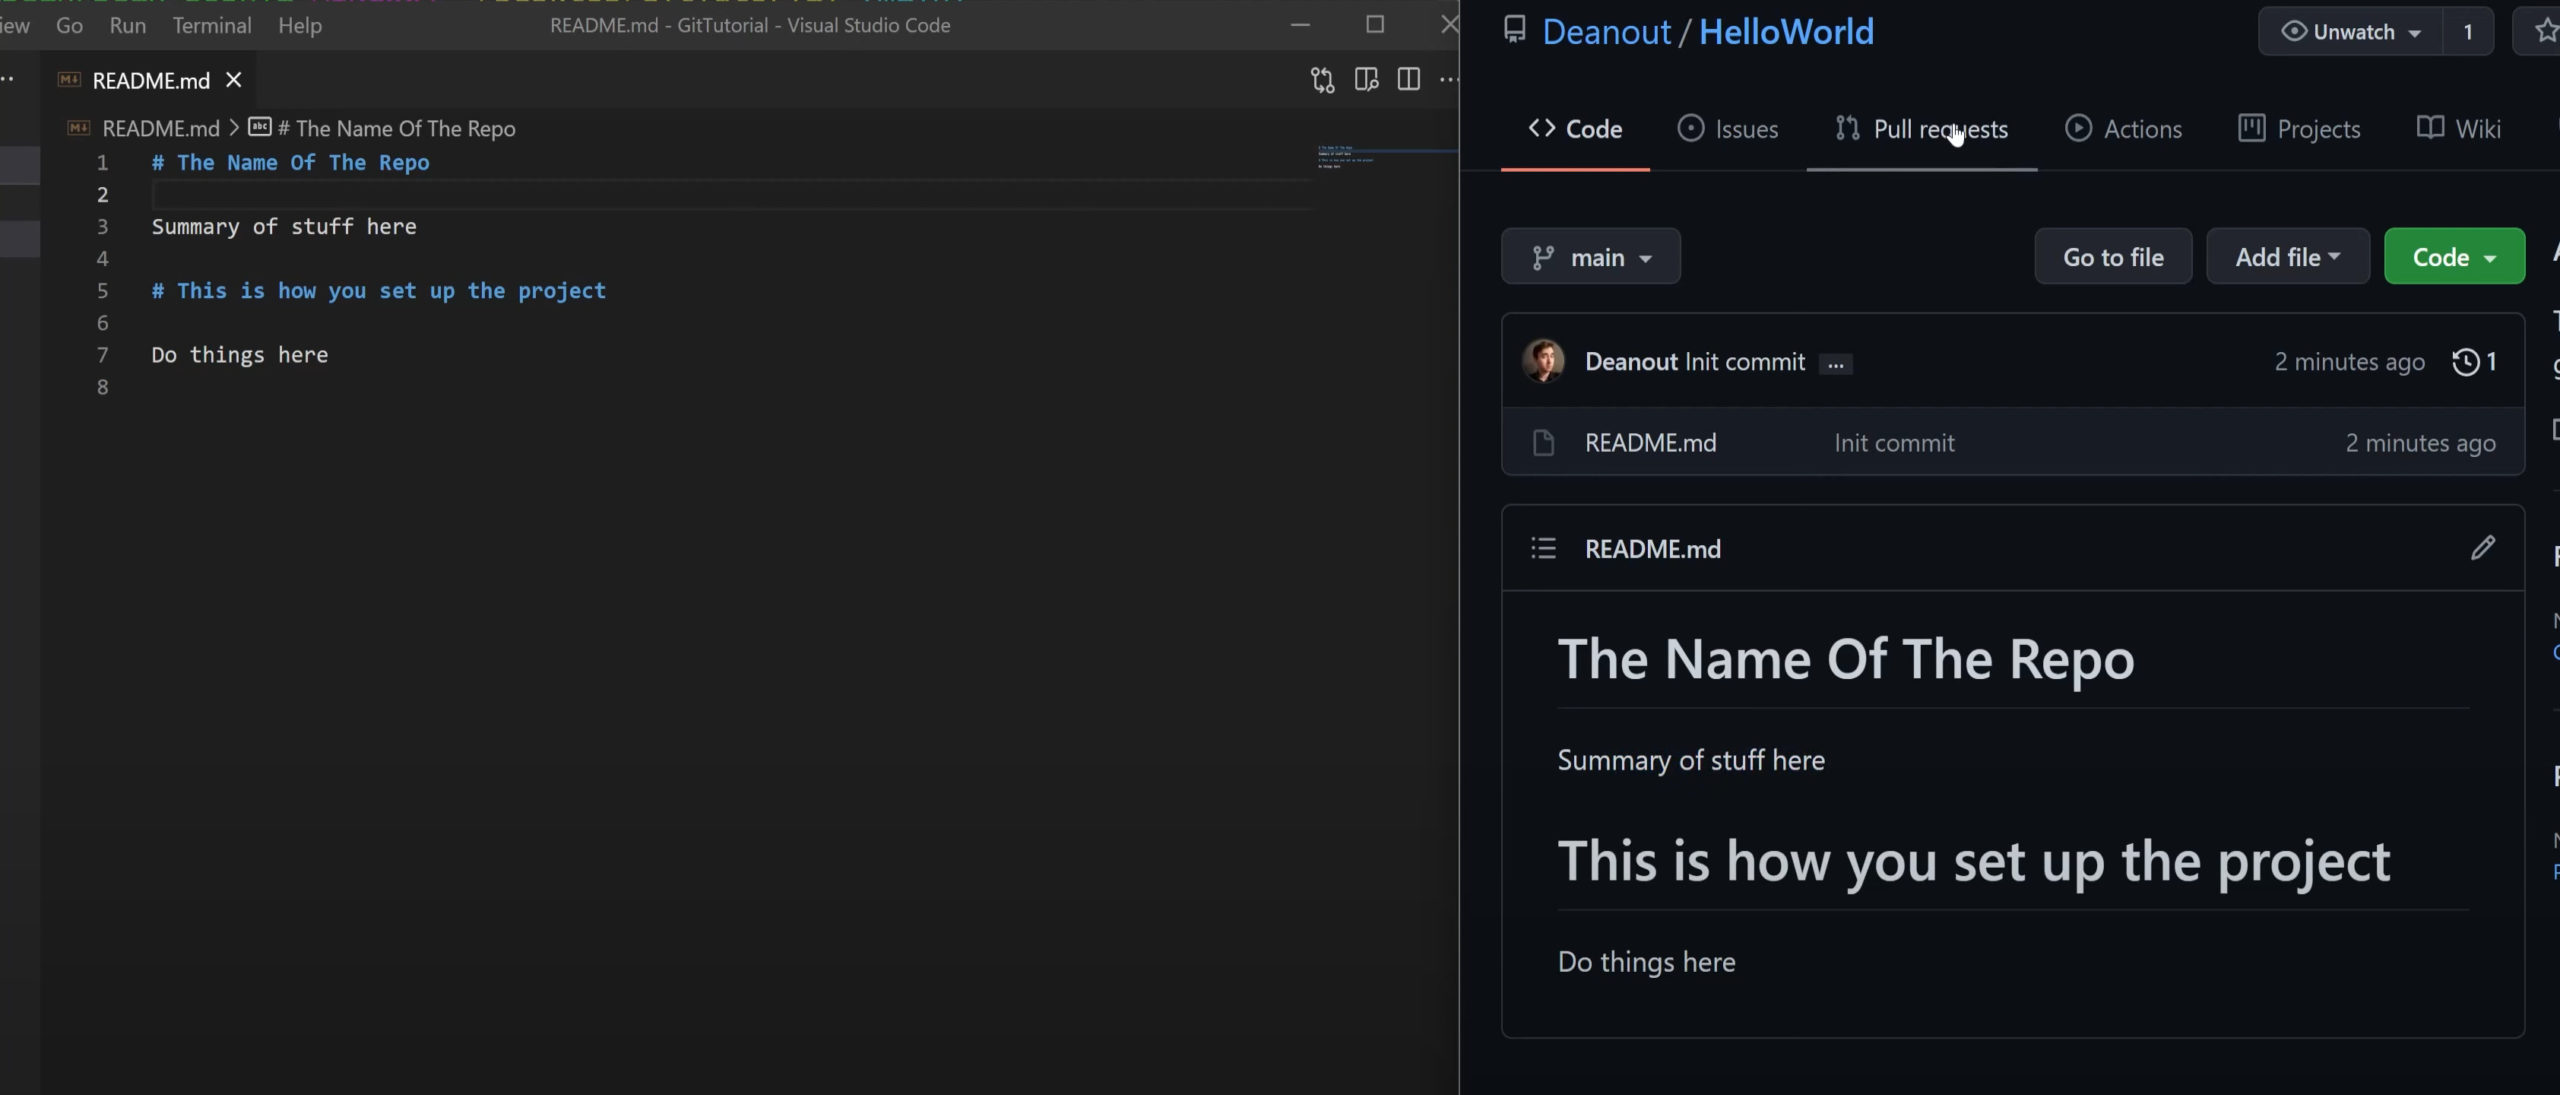
Let’s begin by opening the folder or directory that we want to turn into a Git repository. For me, I created this on my desktop as you can see in the pictures and code below. After creating the folder, I then open it up using Visual Studio Code‘s “code .” command.
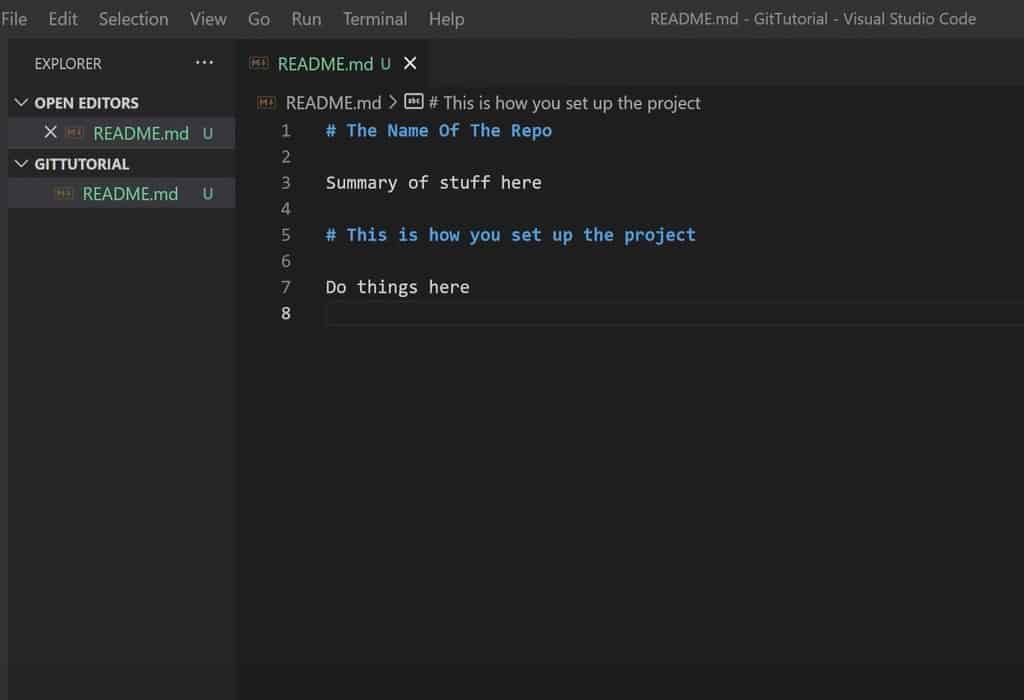
Inside of the Visual Studio Code Window, I create a new file called README.md and fill it with some generic markdown text so that I have something to work with. After this, we set both our name and our email, which lets us track that we are the ones who made these changes. As you begin collaborating with people, this will let you identify who pushed code and when which is incredibly useful for diagnosing bugs.
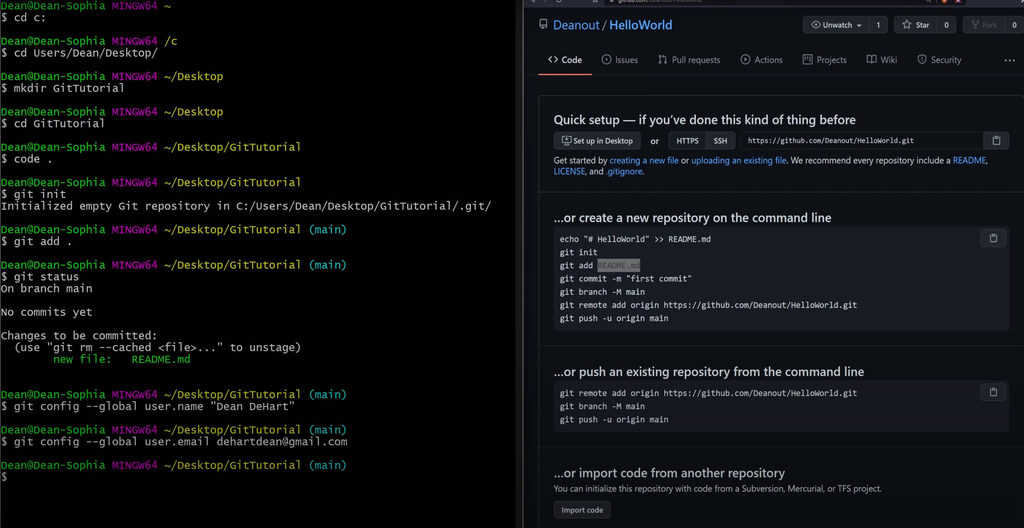
Finally, we initialize our repository in this folder. This creates a .git folder that will contain our change history. We then “stage” our changes by using the “git add .” command to add all changes we’ve made to the staging area. Of course, we’ve only made one change so far, which was creating the readme. We can verify that this is the case by running the git status command, to see that we’ve indeed only created the readme file.
					# I'll start by navigating to the root of my C drive.
cd c:
# Next, I'll move to my desktop.
cd Users/Dean/Desktop
# Now let's make our project folder and change directory into it.
mkdir GitTutorial
cd GitTutorial
# Next, let's open this folder with Visual Studio Code by using
code .

# Create Readme.md

# Configure your name and email so people know who made these changes.
git config --global user.name "Dean DeHart"
git config --global user.email dean@example.com

# Next, initialize the repository
git init

# Stage your changes (Add the readme to the list of changes you want to commit to)
git add .

# Make sure you staged the right changes
git status
4 - Using Git Commit To Commit Your Changes
So far we have staged our changes, but we haven’t committed our changes yet. Making a commit can be thought of as creating a checkpoint in your work. You can commit your changes from your staging environment and save those changes as a step along the way. In the future, you might look back through your commit history to see where a line of code came from; by separating your work into commits, it becomes easier to see the state of the code when a change was made.
Now because we already staged our changes, we really only need to run a “git commit” command to commit them. Simply running this command will open your editor of choice that you set in part 1, and allow you to include a commit message after saving and exiting.
You can, however, include a commit message straight from your “git commit” command by using the -m flag. This allows you to specify your short commit message in quotes after your commit. You also have the option of staging files during your commit, using the -a flag. And, of course, you can stage and create a commit message at the same time with the -am flag. Check out the code below for an example. Only previously tracked files that were changed or deleted are staged with the -a flag. You need to manually “git add” newly created files.
					# Open the big commit message editor and create a detailed commit
git commit

# Create a commit with a short commit message
git commit -m "Init commit"

# Stage all files and commit at the same time.
git commit -a

# Stage all changes to previously tracked files with a short commit message.
git commit -am "Init commit"
5 - Pushing To Your Remote GitHub Repository
Now let’s set the main branch of our new repo using the git branch command. Then we can add the remote origin, which is the remote repository that is the origin of your code. Your local repository on your device is meant to serve as a “clone” of this remote origin. So we’re going to set the origin to be the URL of the GitHub repo that we made in step 1.
Finally, we can move the code from our local repository to the remote repository by “pushing” it there. We do this by using the “git push” command. As soon as you push to the remote, you can refresh your remote and you should see the code up on the server!
By using HTTPS instead of ssh to push code, it might ask you to log in. Make sure you’re logging into the website you expect to host your code on!
					# Set main branch
git branch -M main

# Set remote origin repository (Where we're pushing code to)
git remote add origin https://github.com/YourGitHubUserName/YourGitHubRepositoryName.git

# Push your code up!
git push
6 - Using Pull Requests To Approve Changes
If you visit your repository now, you should see the readme that you made on your local repo appear. Now let’s try to change the contents of the readme. There are a few ways to do this:
- Edit the ReadMe locally, stage and commit our changes, then push them up.
- Edit the ReadMe on the remote’s main branch, and then pull our changes. This isn’t great because you never want to edit the main branch manually.
- Create another branch remotely and edit the ReadMe, then create a “pull request” to request that we “pull” our changes from the new branch into the main branch. This lets the repository owner review the code before it gets “merged” and ensure it doesn’t break anything!
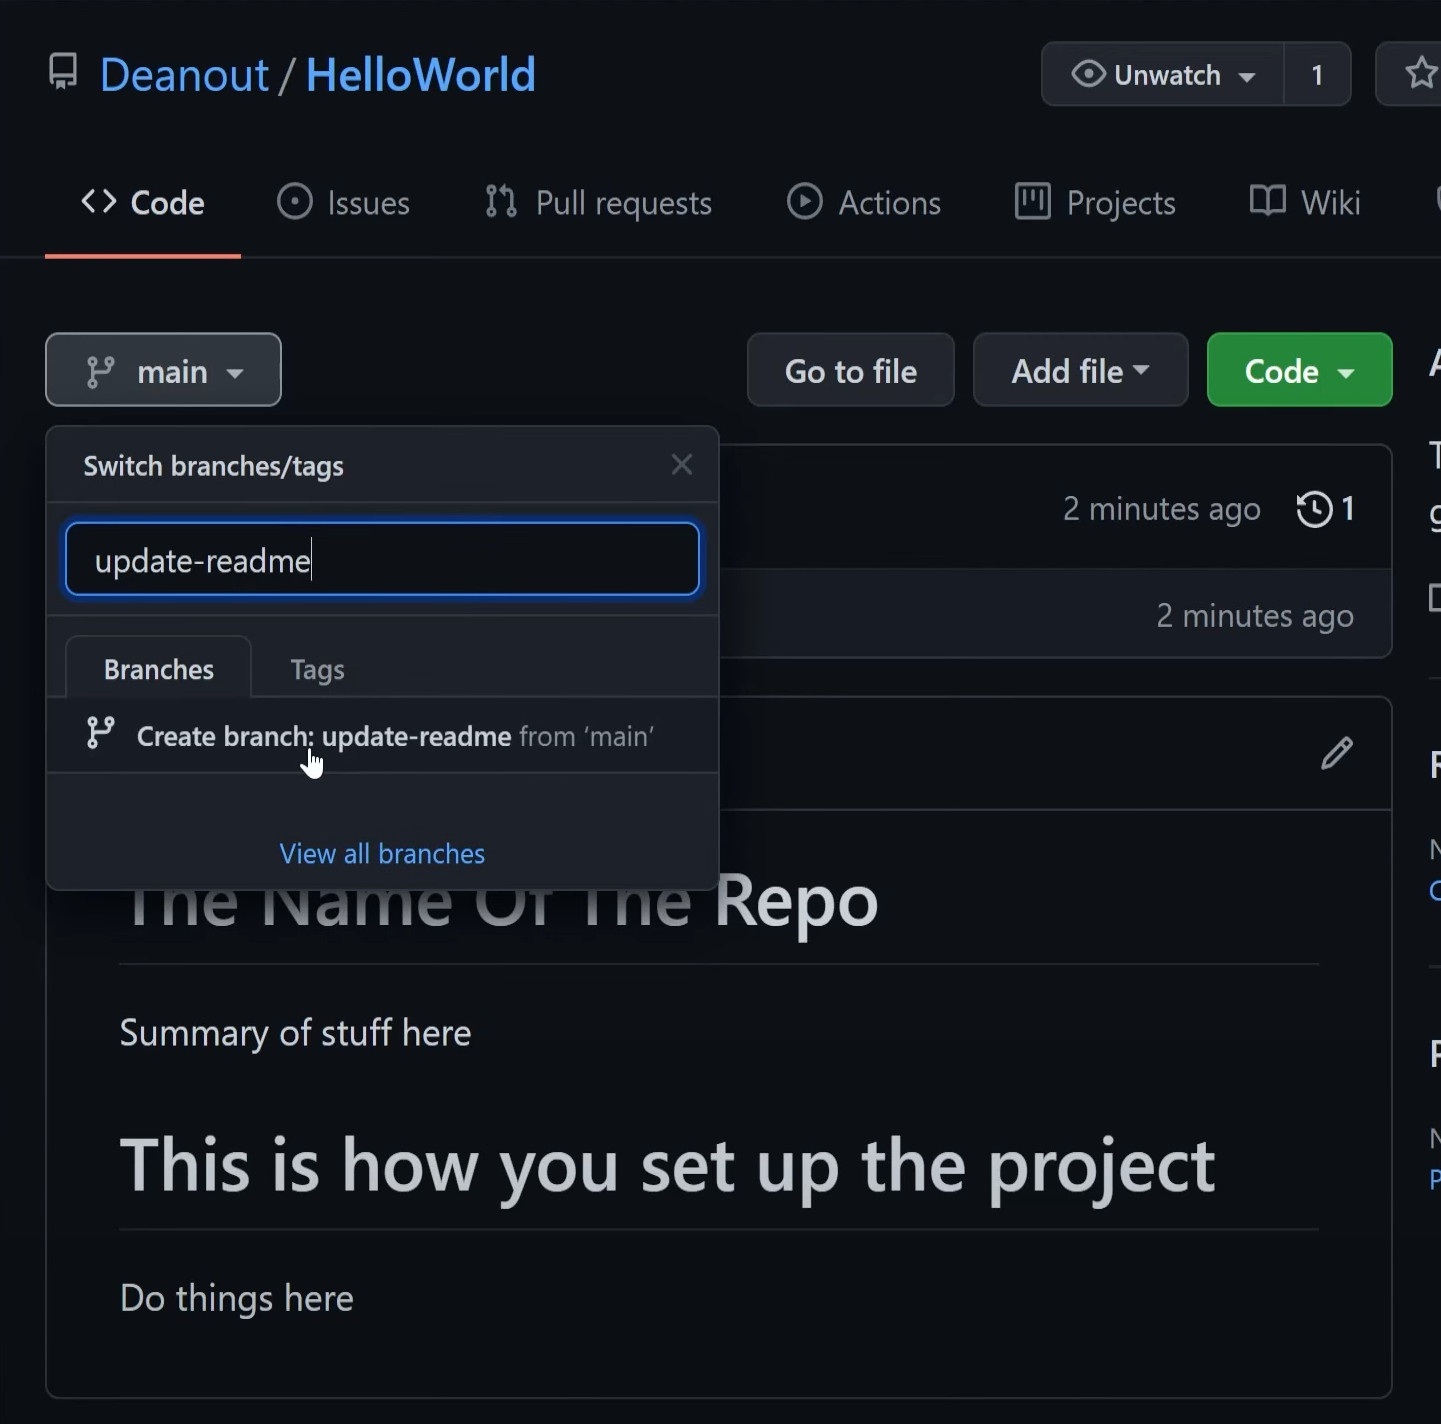
Obviously, we’re going with option #3, considering how much more detailed it is. I’ll outline the steps below:
- Create a new branch called “Update Readme” [Image 2]
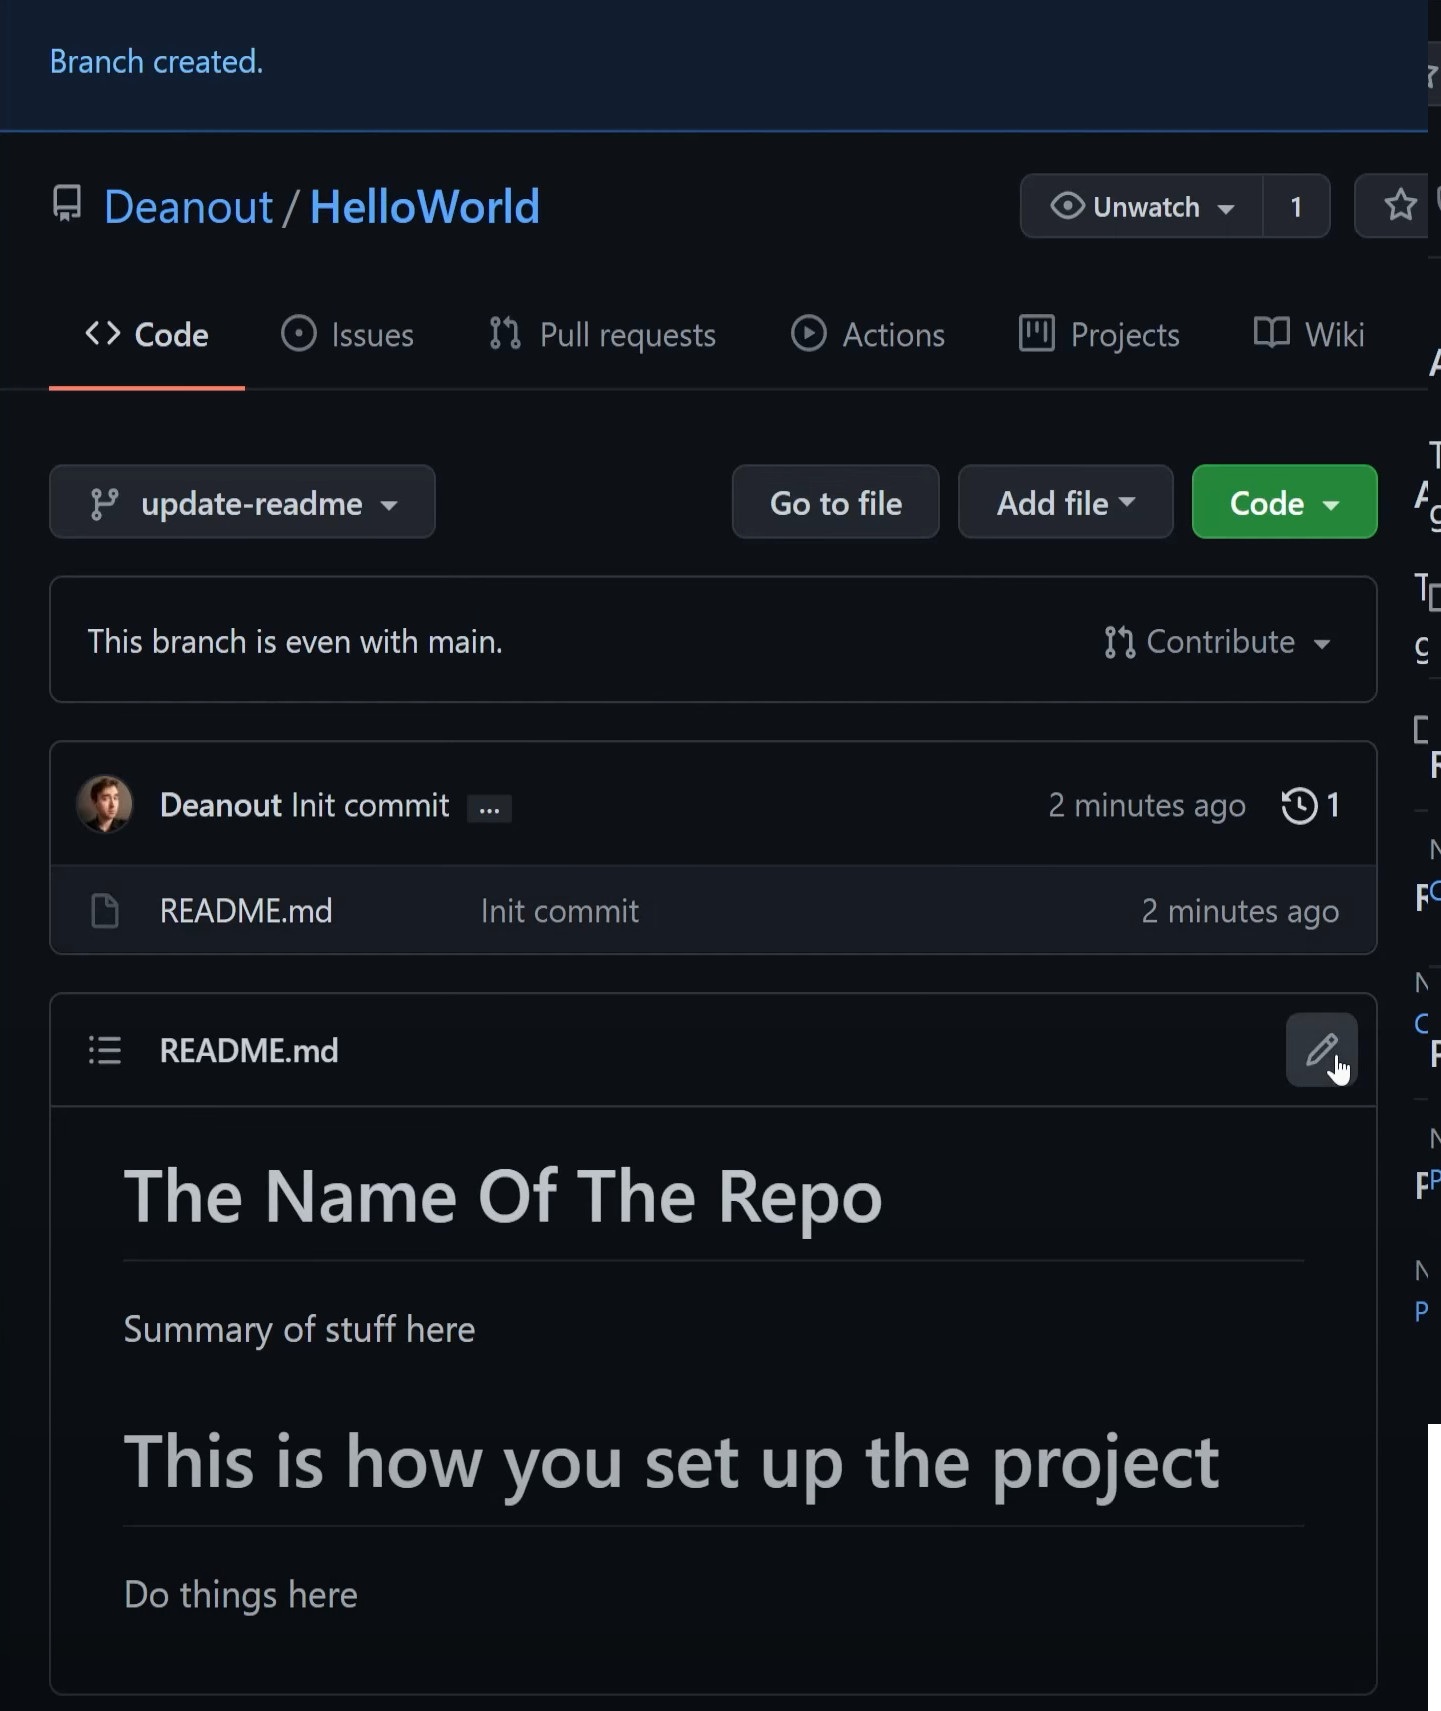
- Edit the readme by clicking the pencil icon [Image 3]
- Commit your readme changes [Image 4]
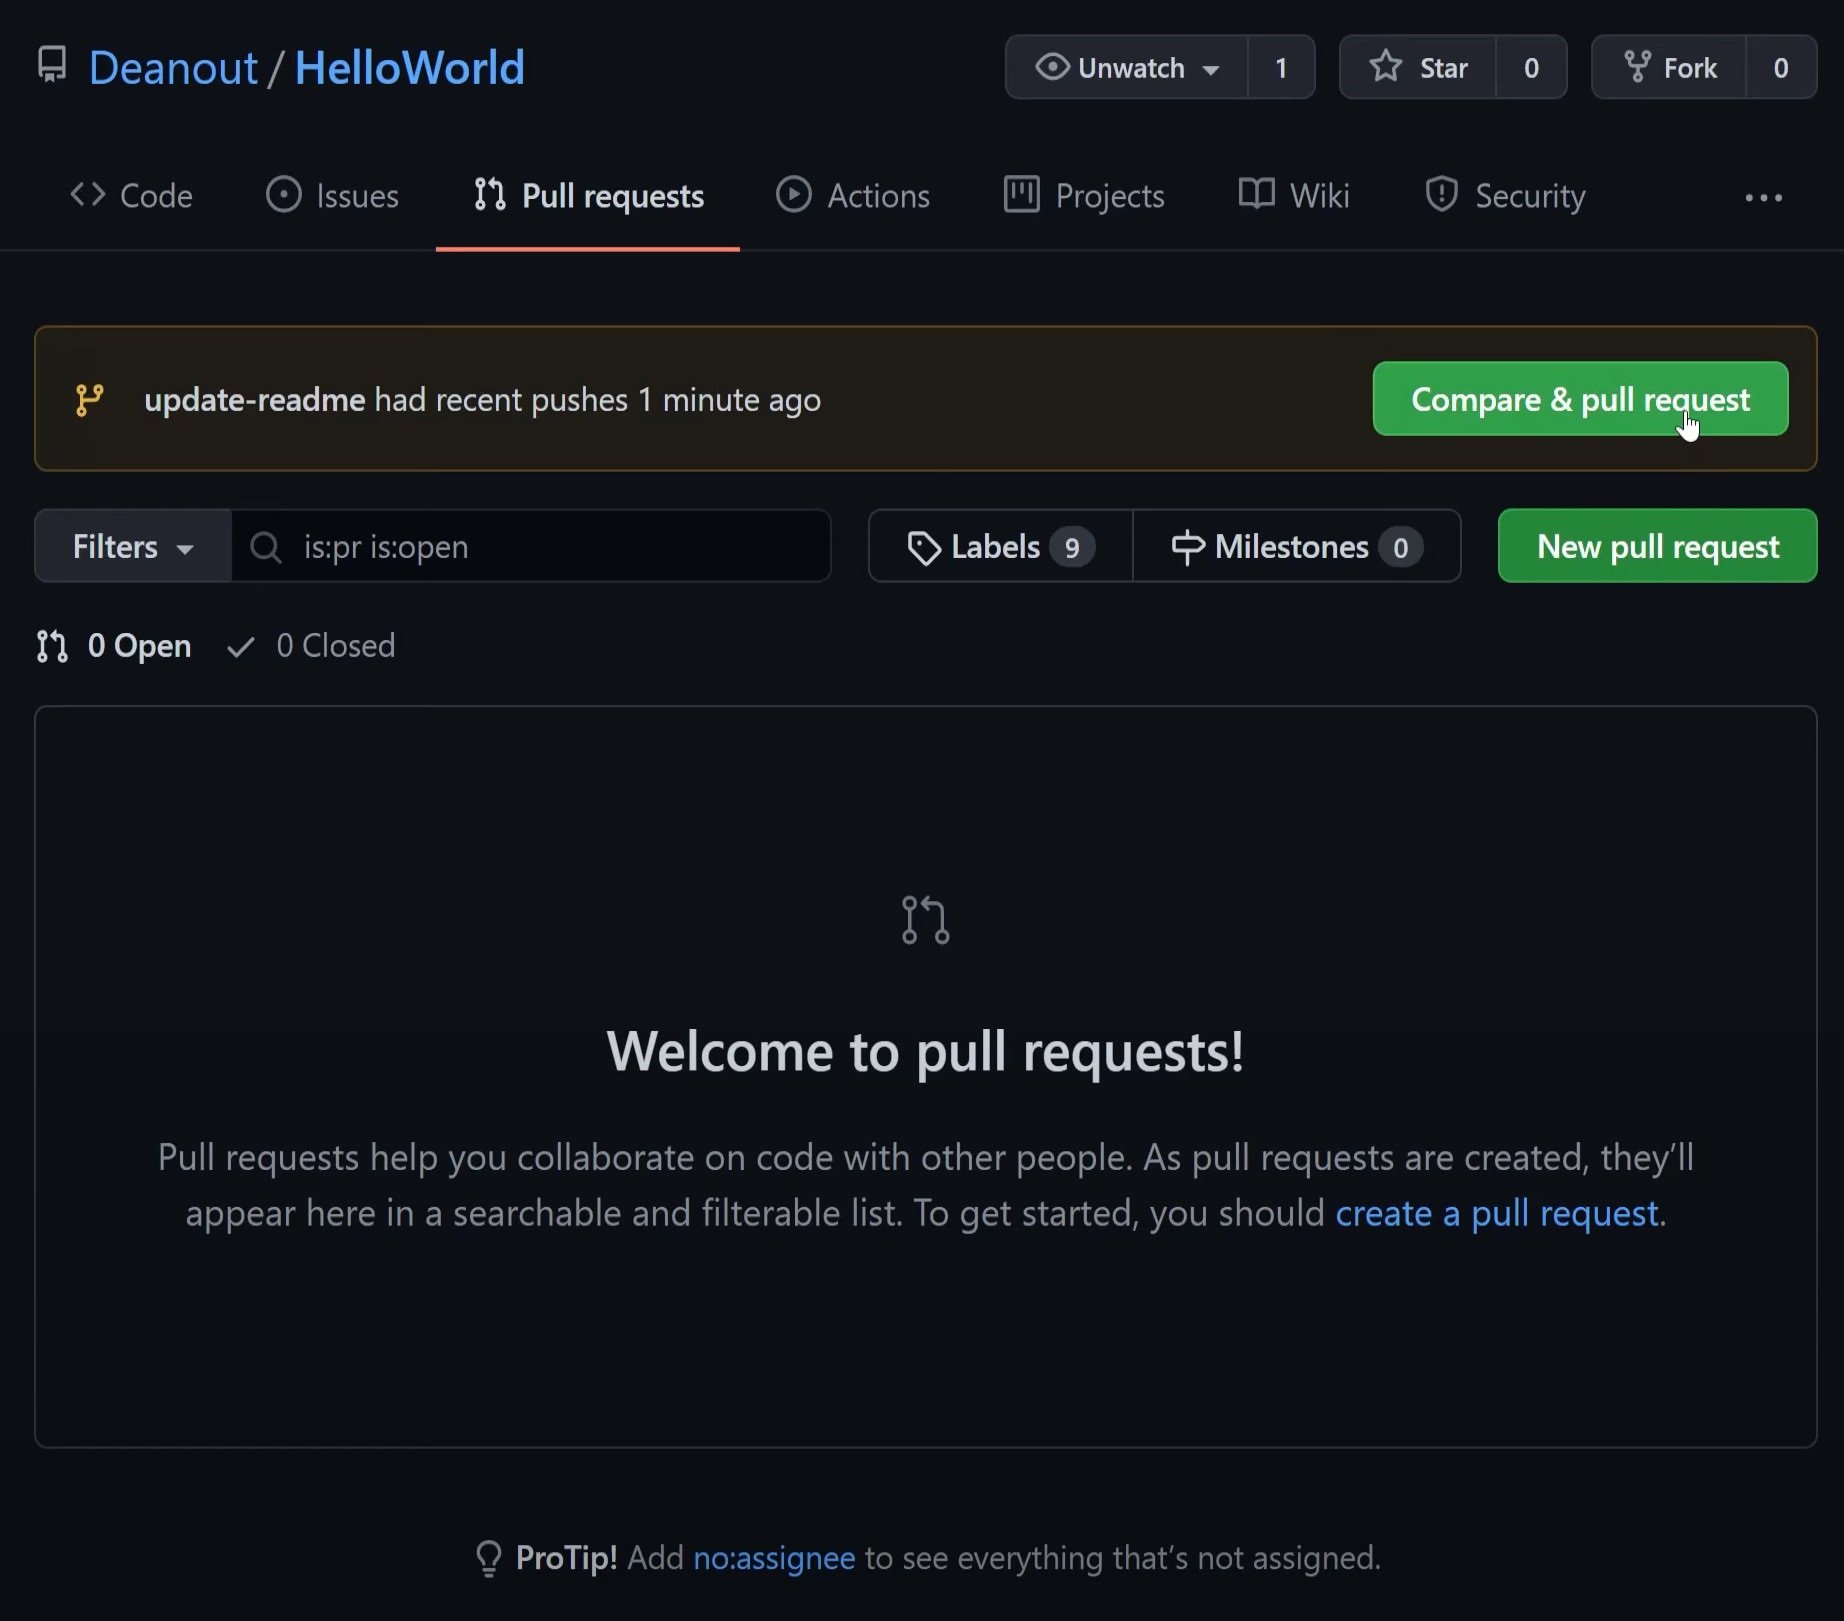
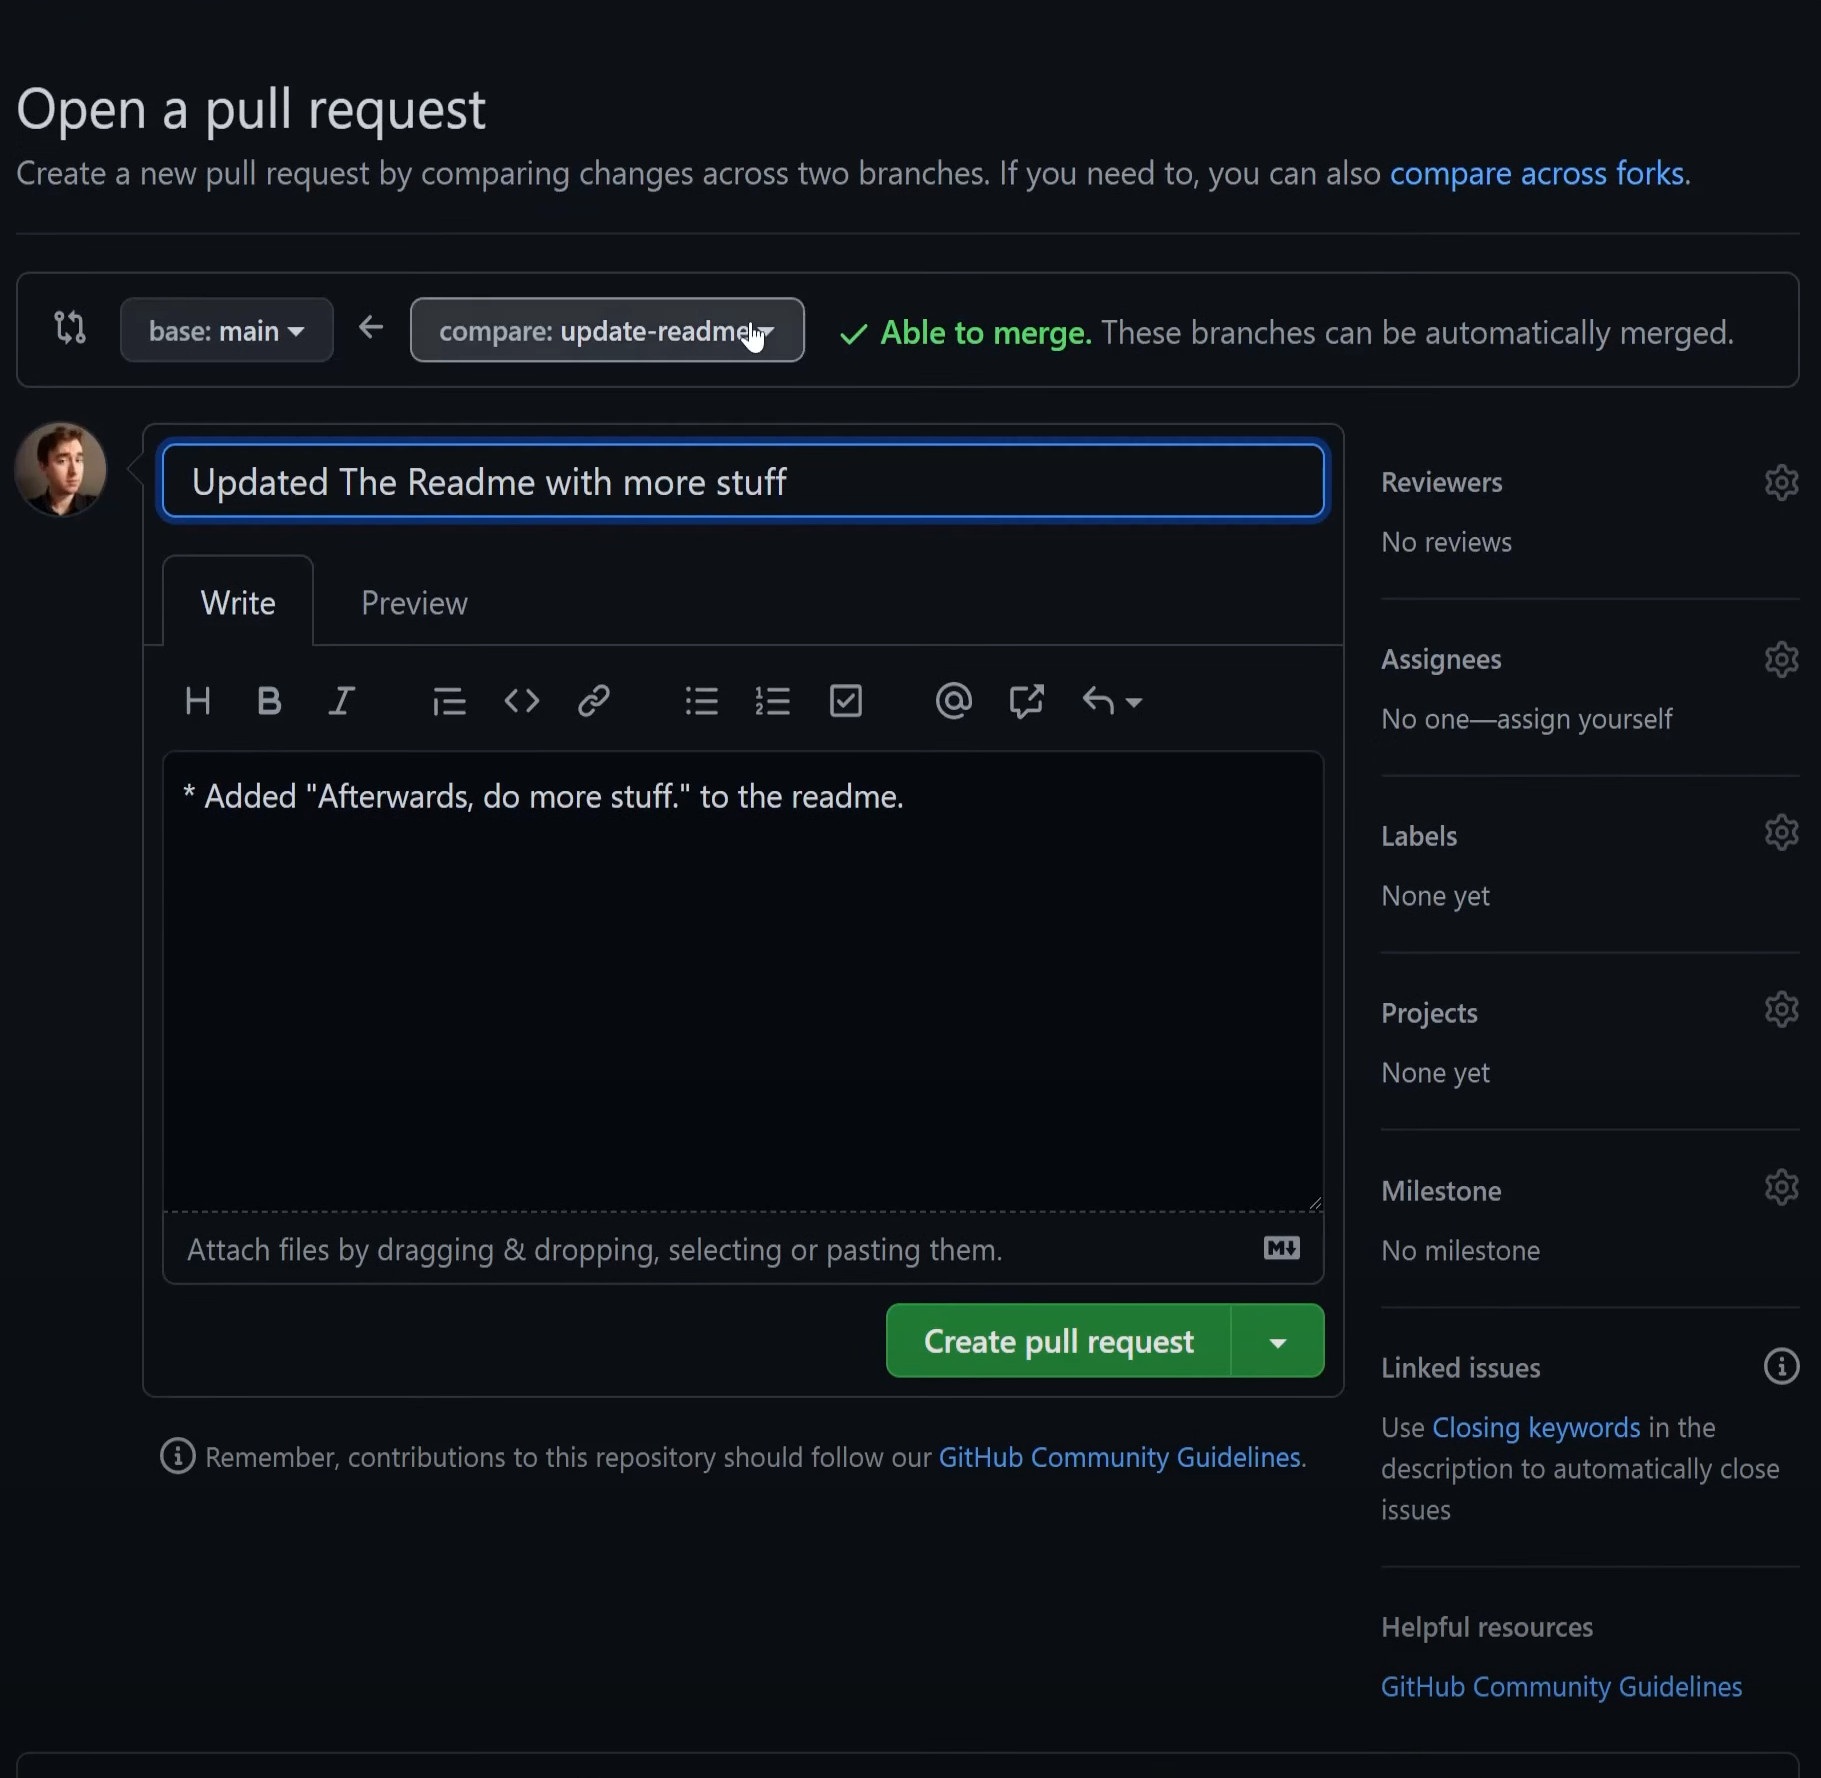
- Compare your branch to the main branch and open a pull request [Image 5]
- Add your pull request title and description. Some repositories and companies have templates for this. [Image 6]
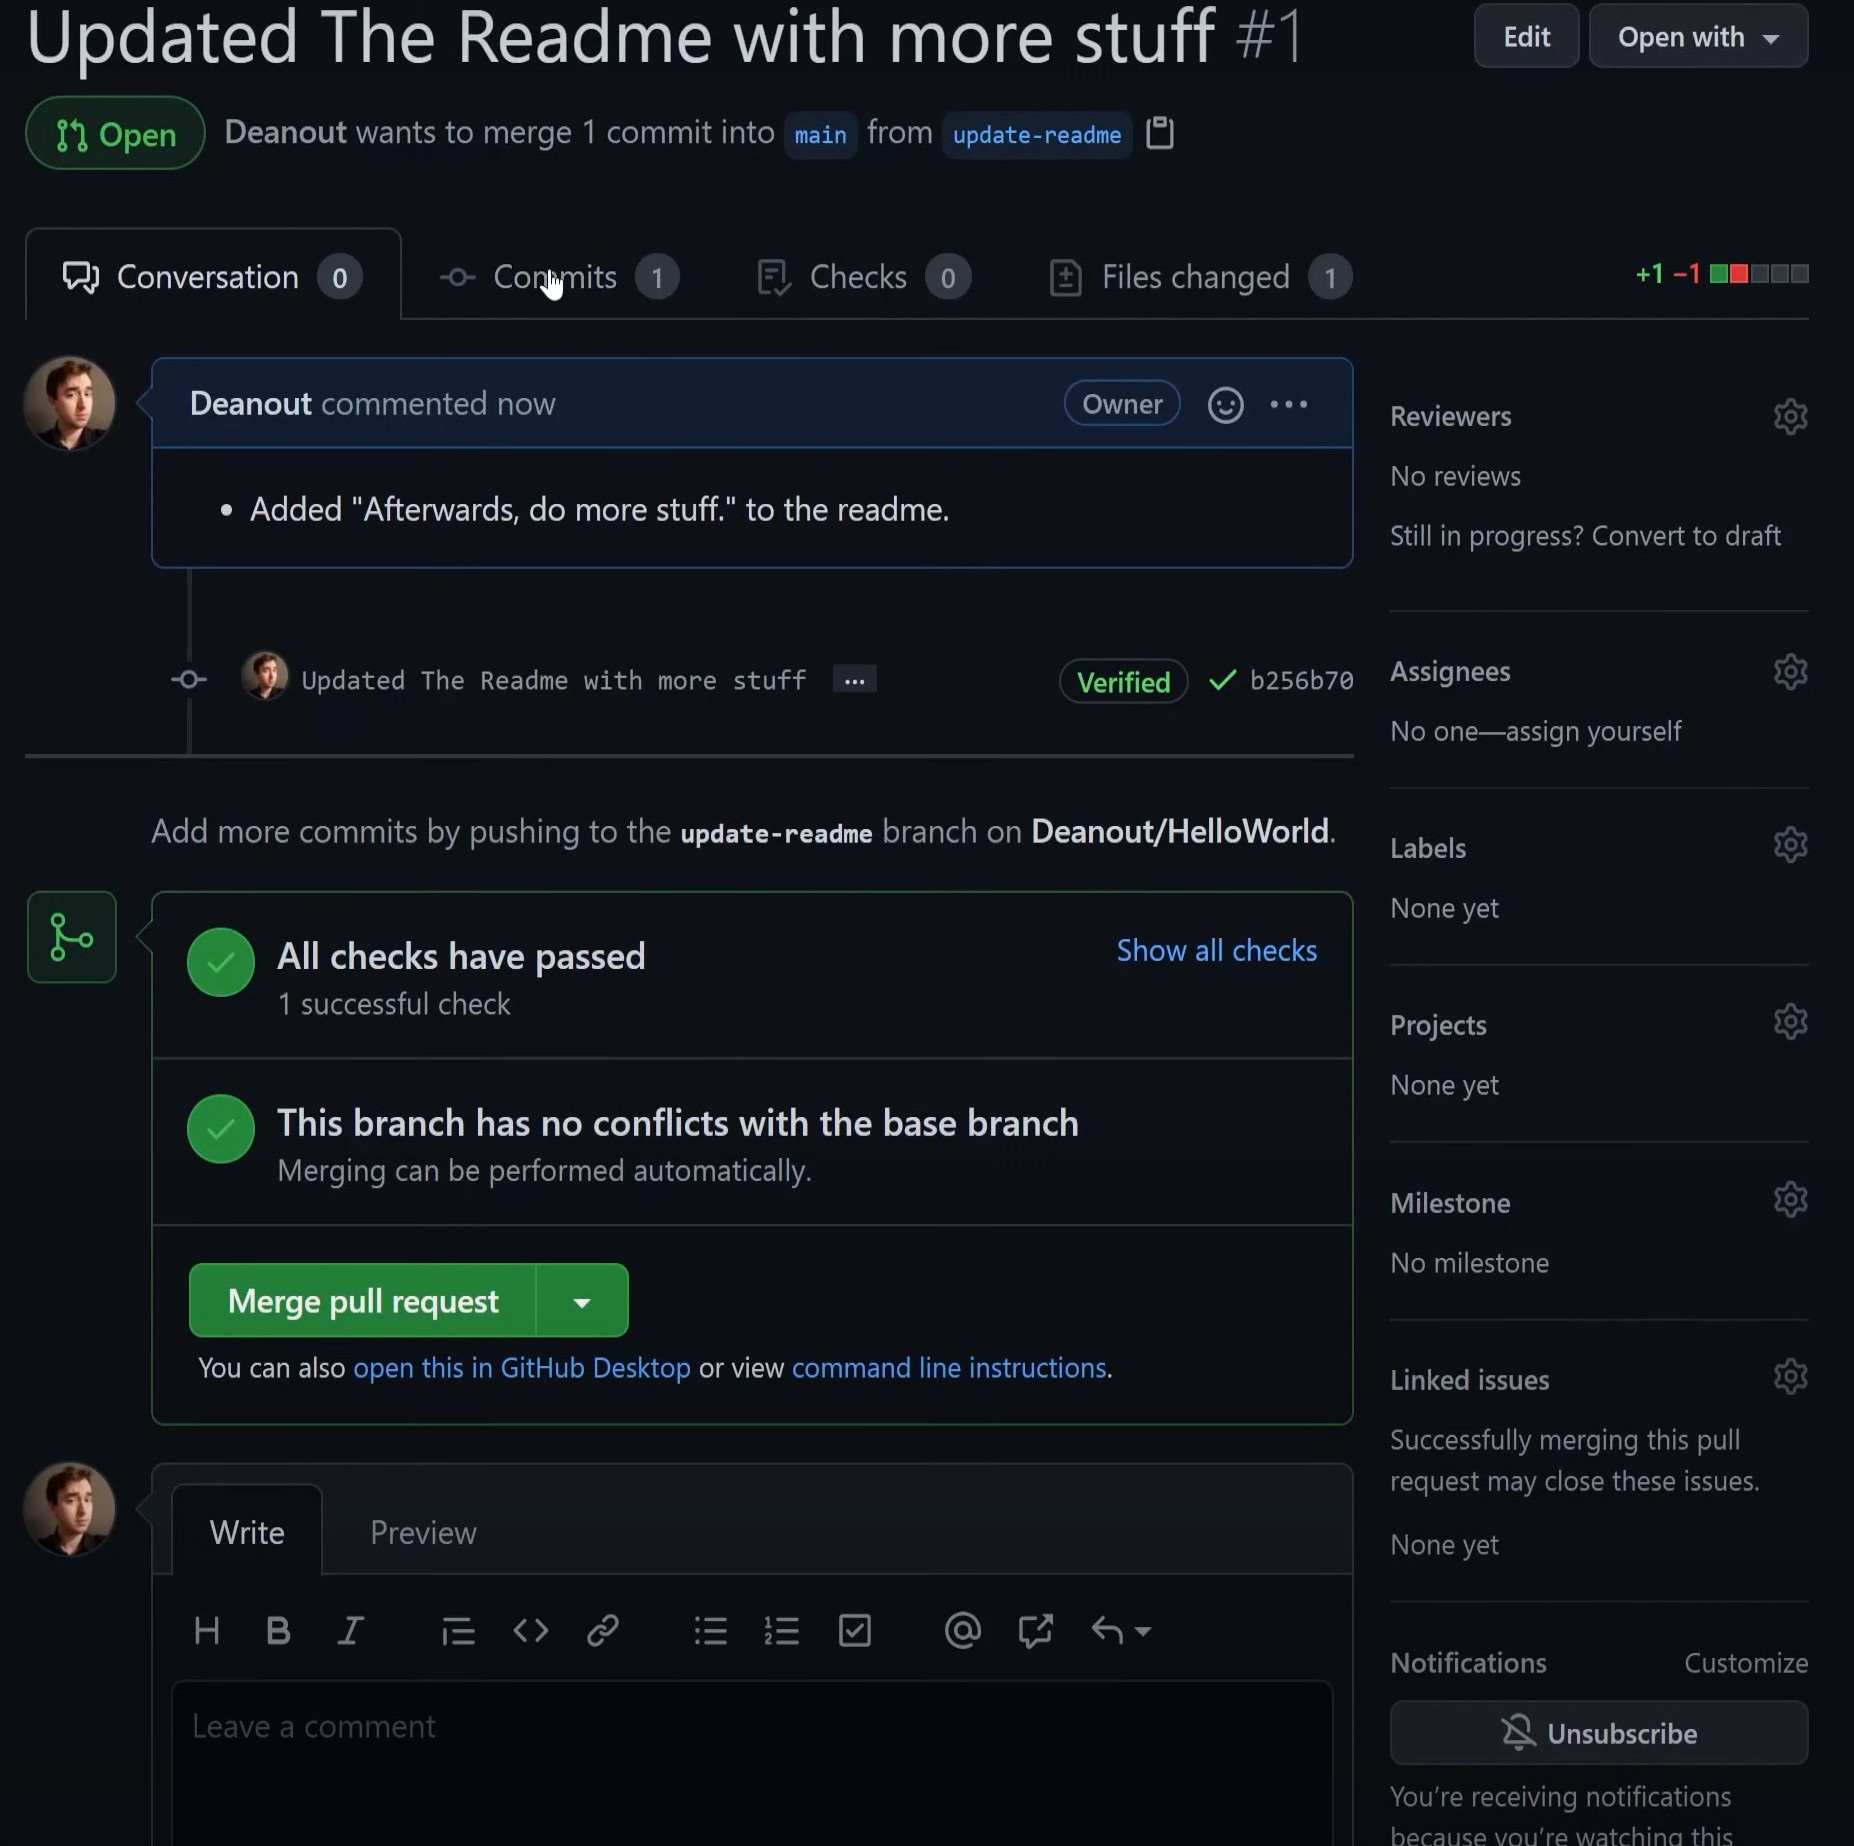
- What a created pull request looks like [Image 7]
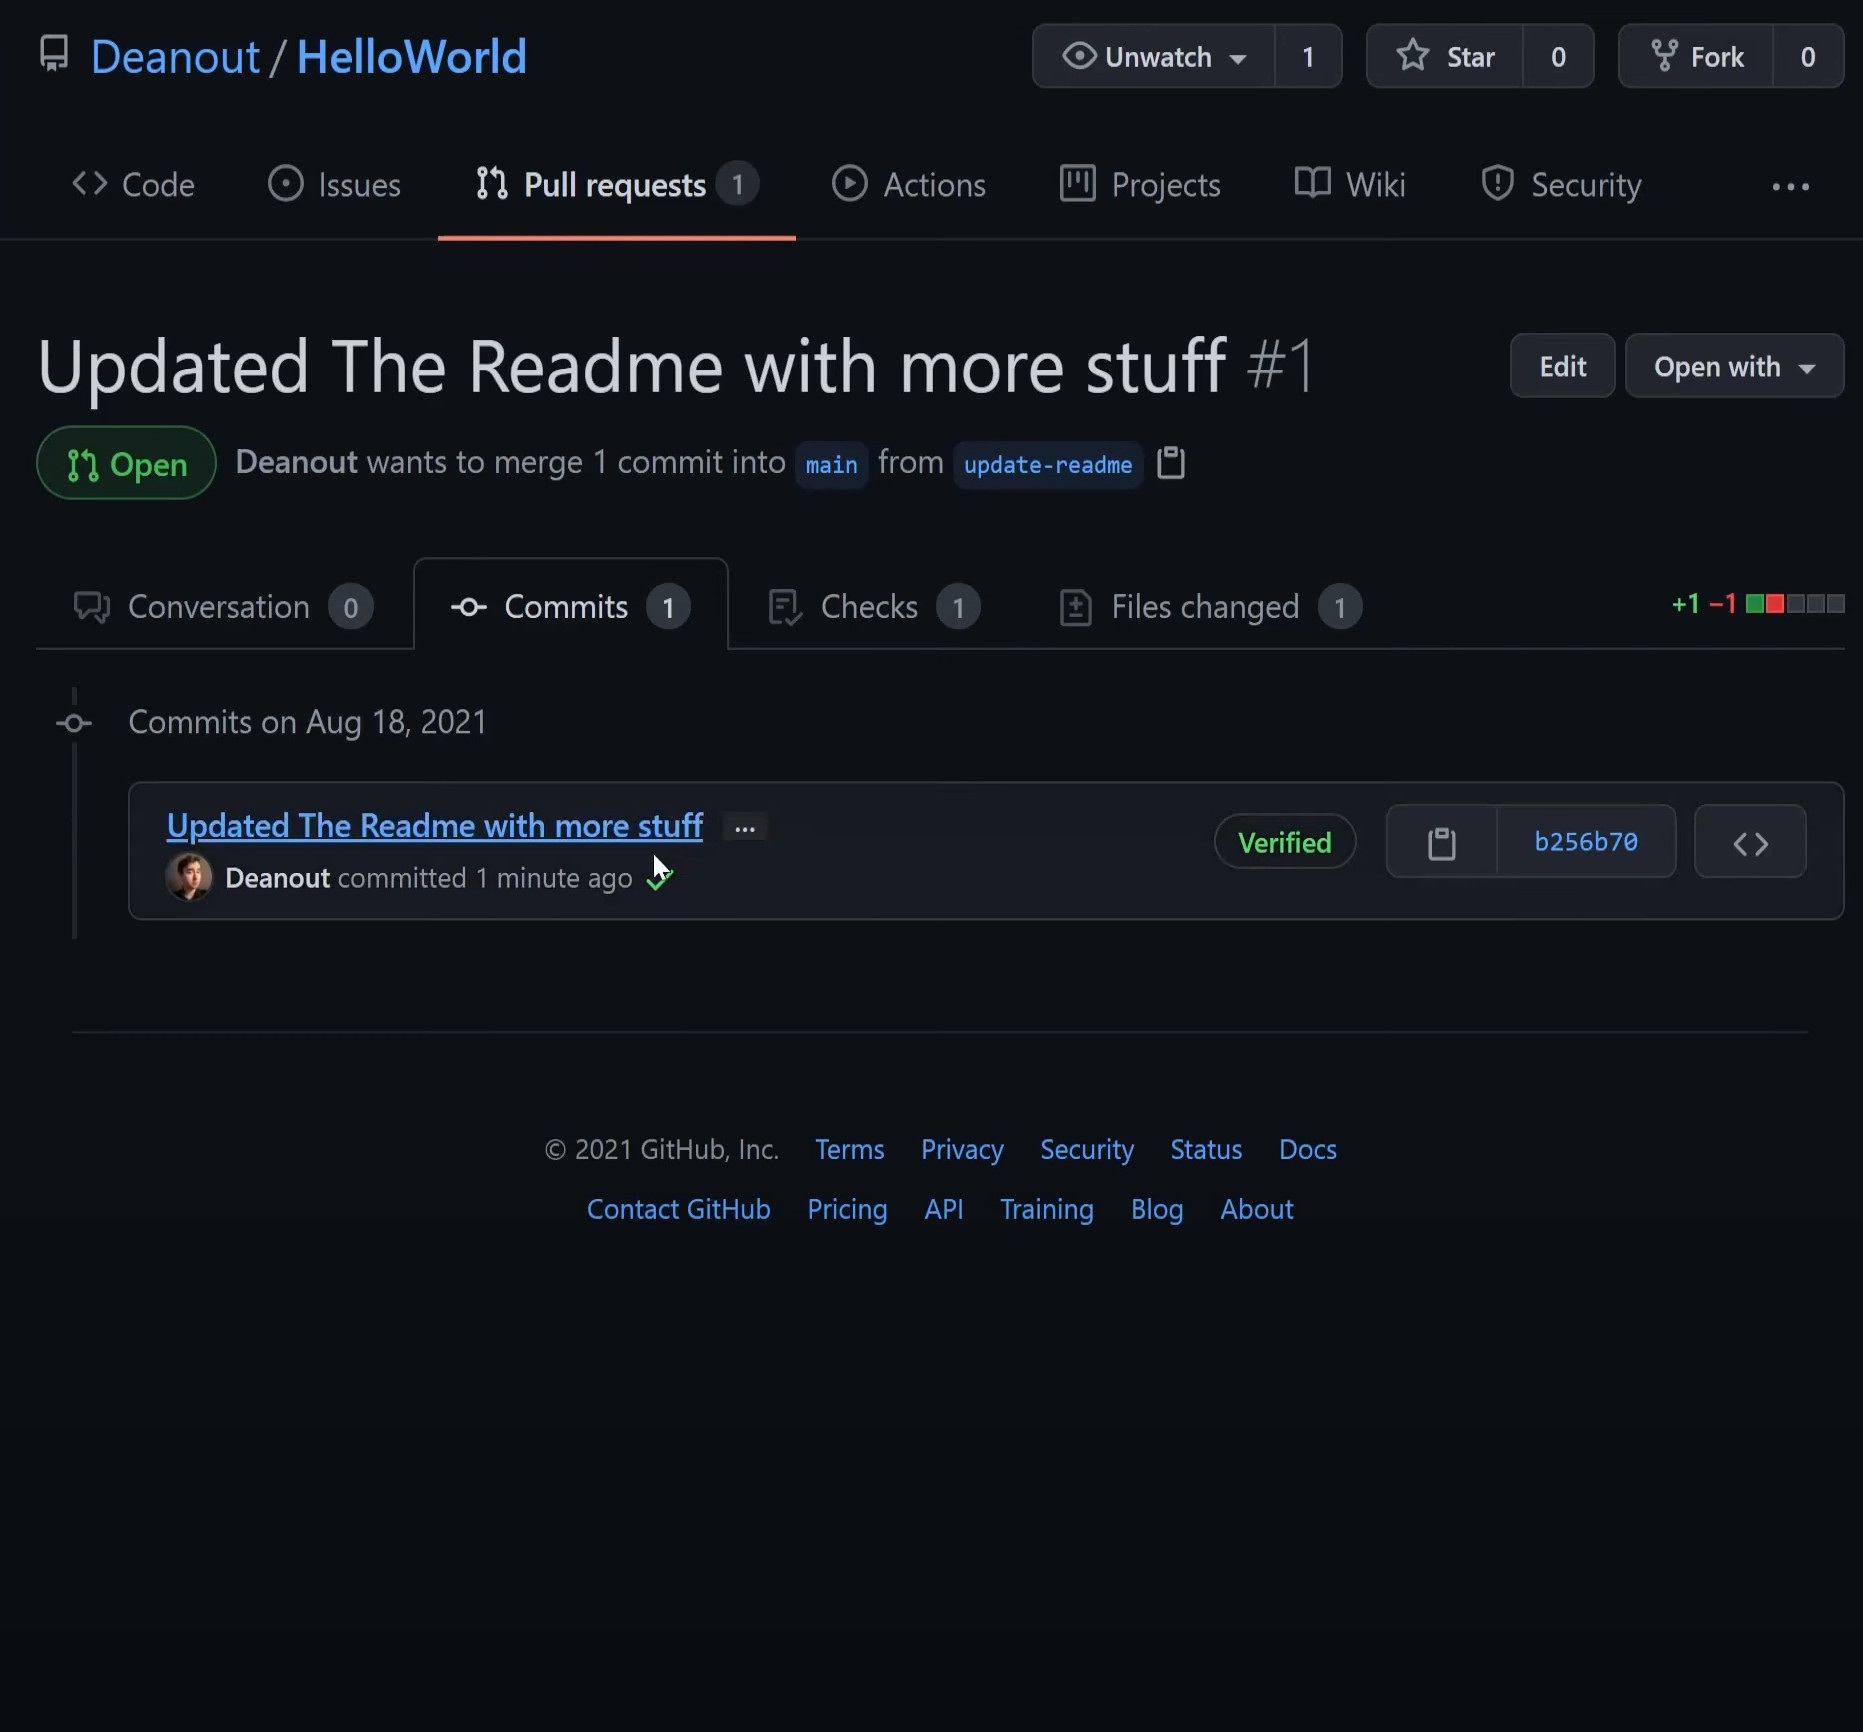
- View a pull request’s history (And see who to blame for breaking things) [Image 8]
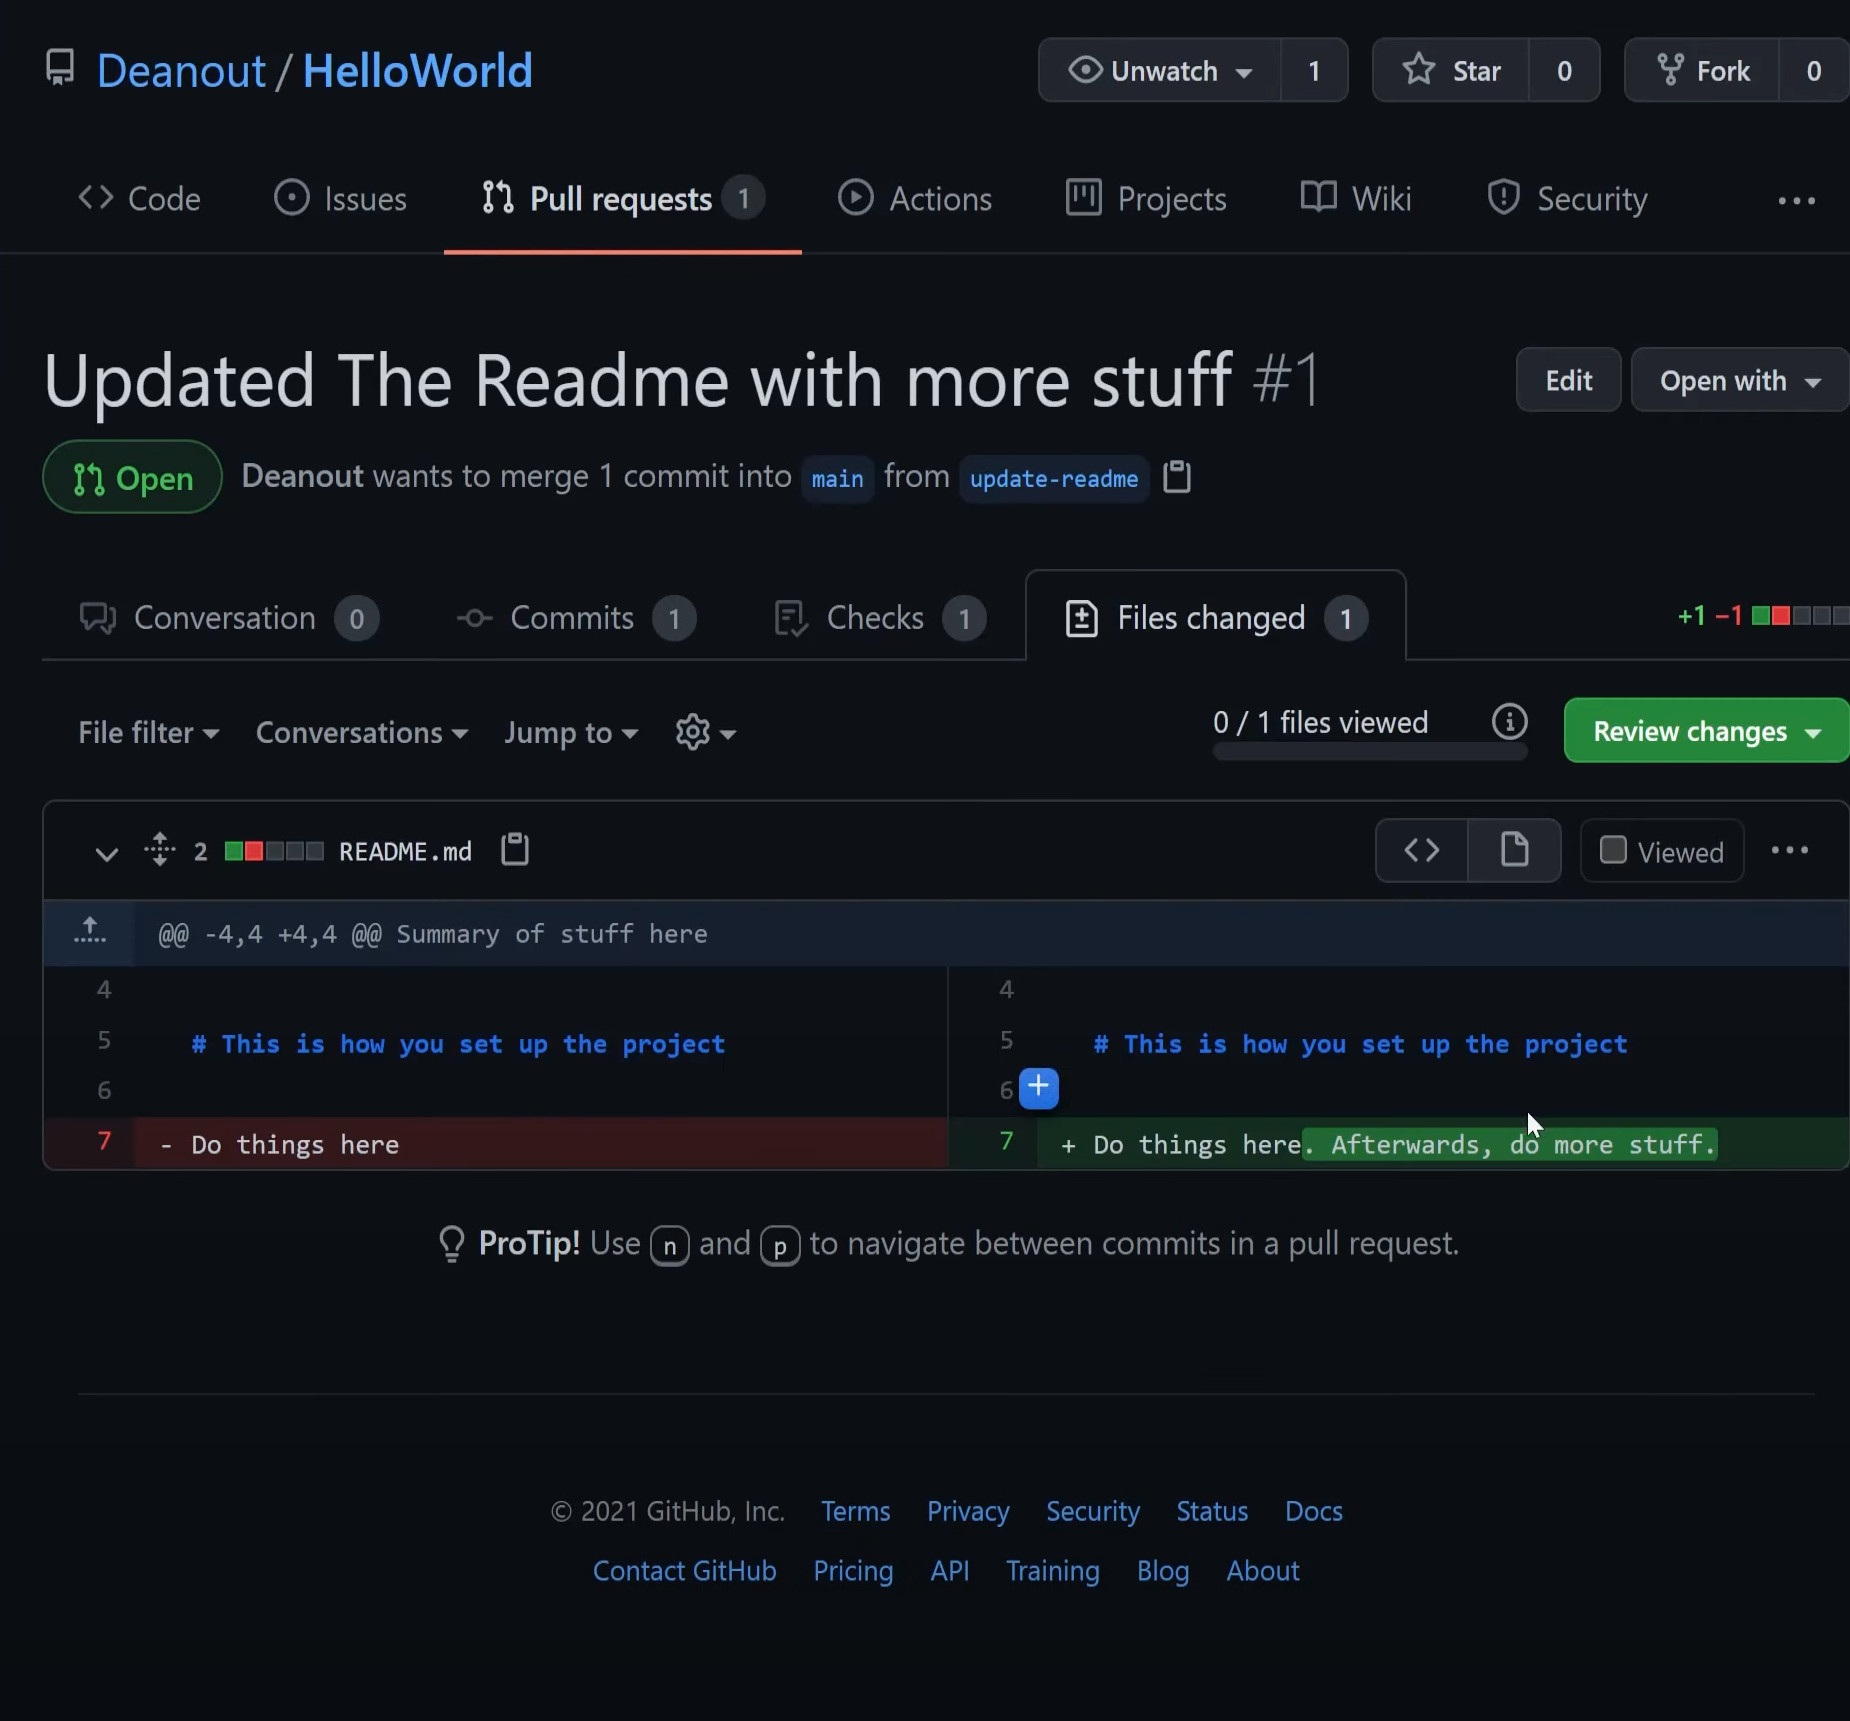
- See the actual file changes of the pull request [Image 9]
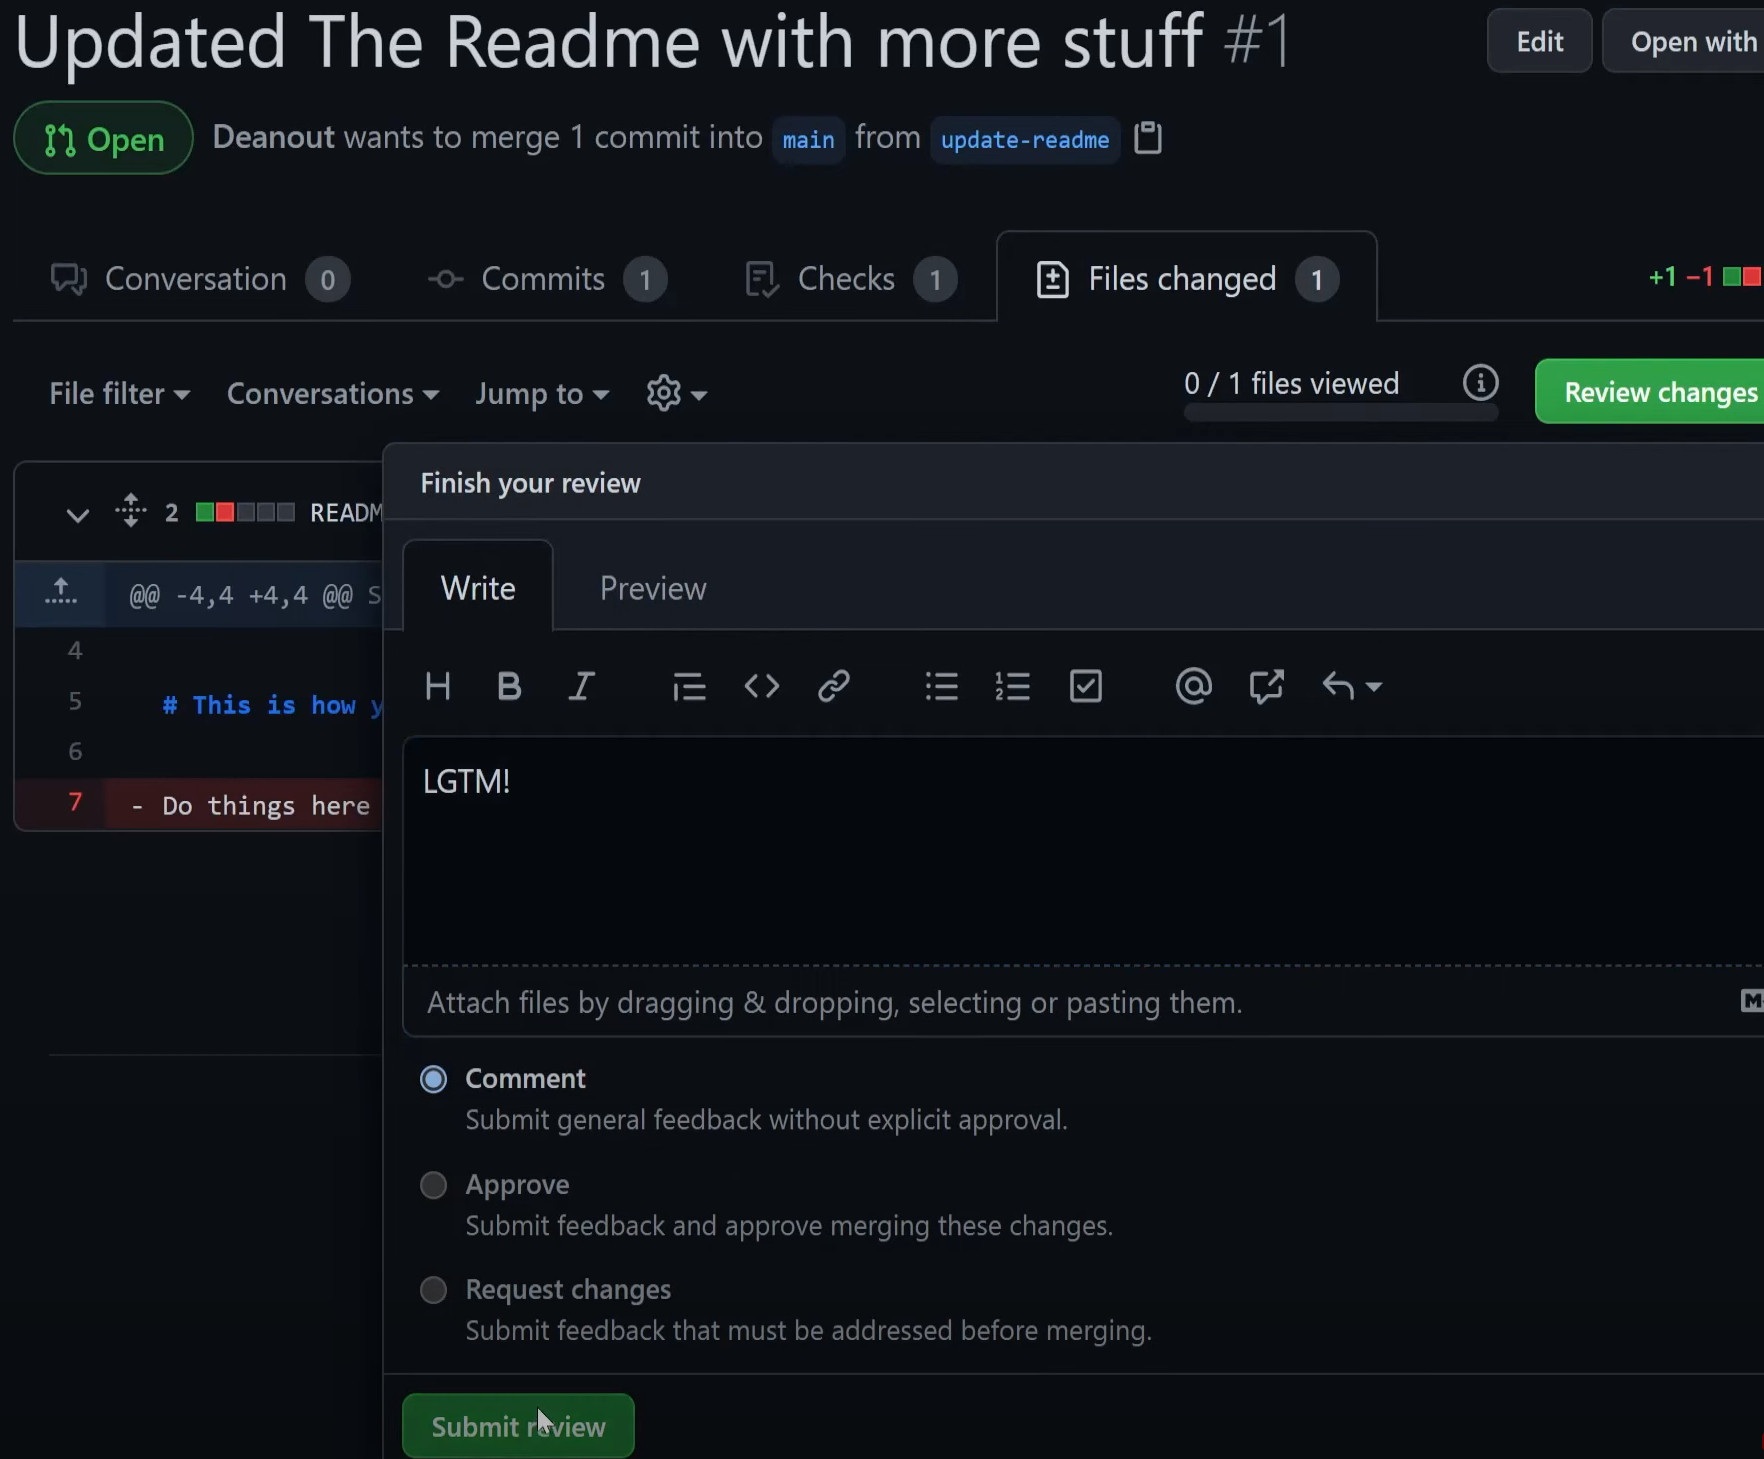
- Give a final review of the pull request! (LGTM = Looks good to me) [Image 10]
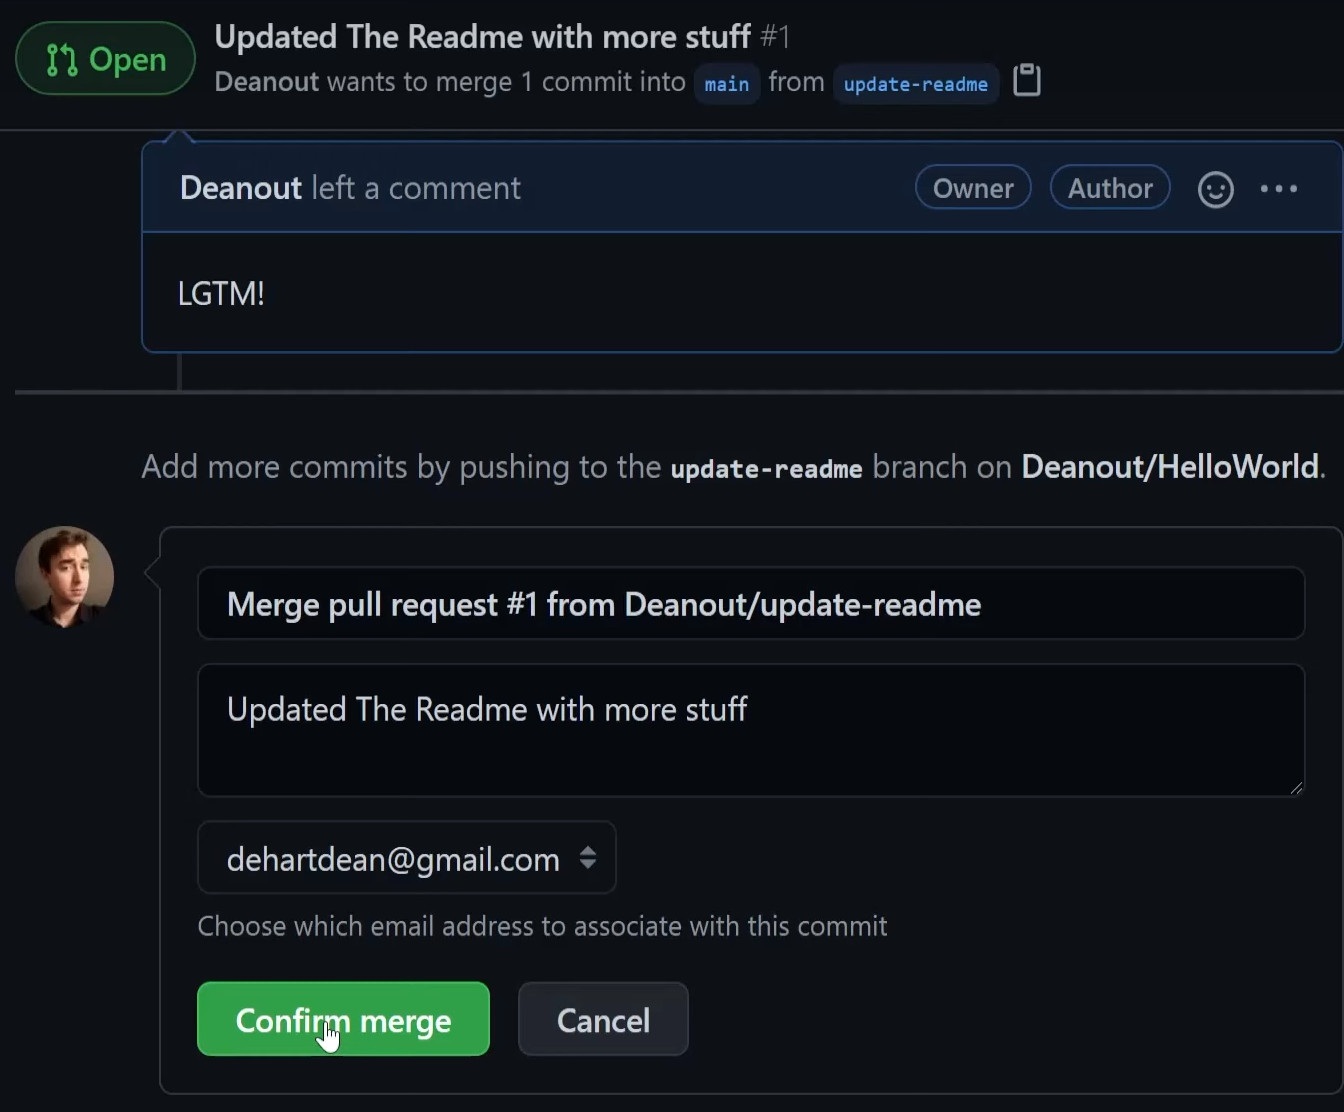
- Merge the pull request, pulling the changes from your branch into the main one! [Image 11]
- Look at the merged PR and breathe a sigh of relief. [Image 12]


7 - Pulling New Changes From Your Remote
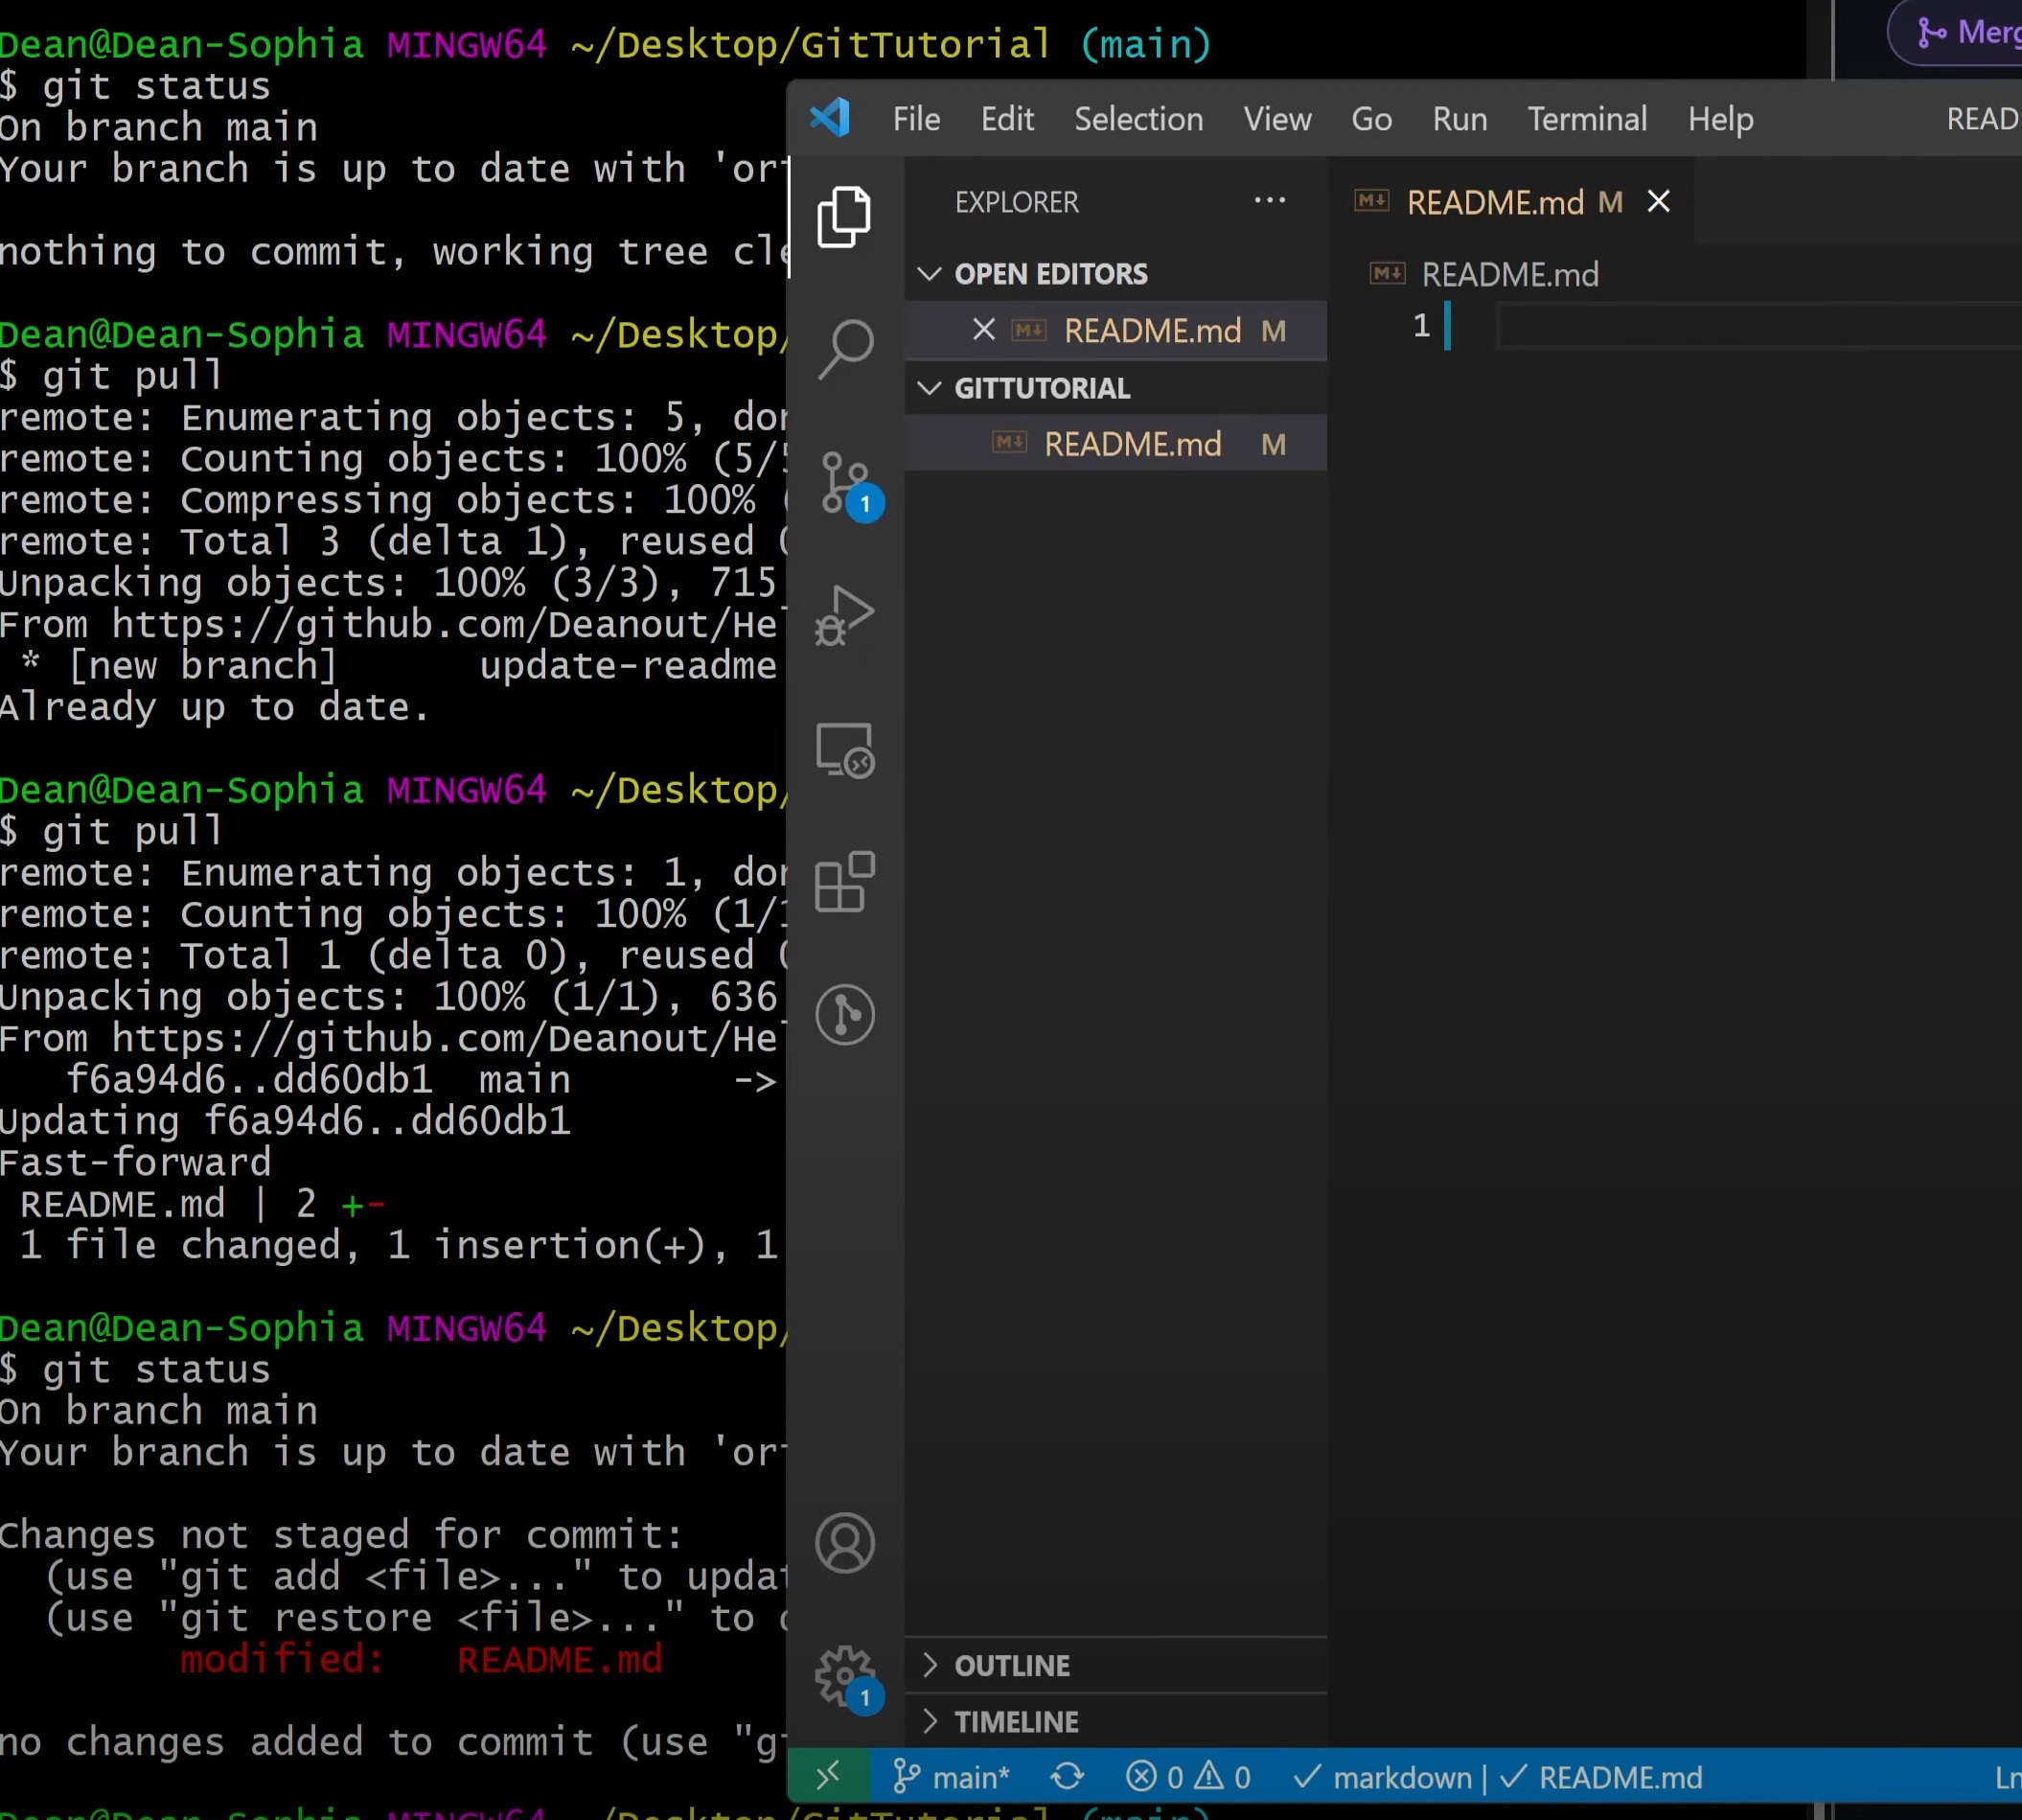
The changes that we made in the previous section were made on the remote repository but have not been “pulled” down to our local repository. To do this we can use the “git pull” command to pull the changes down to our device. This allows us to grab the merged pull request changes made by our team–or ourselves–and use them locally.
					# Pull remote changes
git pull

# If you just want to see if there are any changes on the remote, you can use this command
git fetch
8 - How To Reset Your Git Branch
Let’s say that you were to make a change that completely ruined the current state of your local branch. The beauty of using Git is that it allows you to undo mistakes like this. For this example let’s delete the entire contents of the readme and save an empty file. If we now run git status, we’ll see that the file was modified and that we could commit these changes.
We don’t want to commit changes that delete the entire contents of the file though. We just wanted to make a small change. Well, we can “revert” to the previous state of the branch at the last commit by using the command, “git reset –hard” as seen below.
					# Reset the state of your branch to where you started.
git reset --hard
9 - Conclusion
As you can see, there is a lot more to using Git on Windows 11 than just installing it. But these essential actions that I showed you today constitute a lot of what working with Git is like as a software developer. Through the use of Git clients like SourceTree, the GitHub client, or GitKraken, a lot of these actions are automated. That said, it’s always good to know how the commands work under the hood.
This type of conceptual understanding will elevate you above your peers when you enter the workforce or aid you in creating your own projects. If you’re interested in learning more, remember to check out the Git Developer Essentials course available (Soon) here. And remember to use code GIT11Off to, well, get 11% off. 😉